Showing posts with label cooking. Show all posts

Wednesday, April 28, 2010

recipe: now is the time to eat your lawn

Every spring, for the past several years, I've been telling myself: "Mark, eat the dandelions in your yard. They're so good for you and I bet they taste great. The co-op is selling them for $3.00 a bunch!" It's a fleeting thought that evaporates with the summer heat, when the dandelions morph from almost-pretty spring flora into desolate, dried-up, seed dispersing weeds. With a new baby and toddler in the house, my approach to lawn care has dropped to historically low levels, if it can be considered "care" at all. The upside is that my small city lot is, quite honestly, a dandelion farm. During times of famine, Italian schoolchildren were sent to the fields to gather wild greens, so why not harvest some from your (chemical free) yard?

This reality most certainly keeps my neighbors up at night, but they're missing out. In fact, they're likely chatting, nervously, about my lawn over a bag of pre-washed lettuce from sunny California. At this time of year, at least in MN, the dandelions are lush and tender, the flower heads just beginning to emerge. Dandelion greens are a great substitute for spinach or arugula, so you can prepare them as you would any other dark leafy green, such as chard, kale, collard green, etc. They even taste great in a salad with vinaigrette.

recipe: sautéed dandelion greens
In recent months I've resorted to increasingly minimalistic techniques to put fresh food on the table quickly, while keeping two little ones out of trouble. Consequently, this recipe doesn't break any new ground, but it will give you an idea of how easy it is to prepare utilitarian sautéed greens, which make an excellent first course, side dish, or leftover ingredient for other dishes like omelets and quiches. It's also an excuse to put down the laptop and weed your yard or garden.

Note: Like spinach, dandelion greens will wilt to a mere fraction of their initial volume, so you can cook a lot of them at once. Just make sure you have enough of the other ingredients to season them well.

Ingredients

  • One large bunch of trimmed, washed, and roughly chopped dandelion greens (two big fistfuls)
  • 2 cloves of garlic, thinly sliced
  • olive oil
  • balsamic vinegar
  • red pepper flakes (optional)
  • coarse salt and freshly ground pepper
Technique
  1. Heat a few tablespoons of oil in a skillet. When smoking, add the garlic and optional red pepper flakes. Cook until garlic is very fragrant (but not brown), about 30 seconds.
  2. Add the greens and stir them quickly as they wilt. Cook until greens are still bright in color, but quite tender (3-5 minutes).
  3. Add a few splashes of balsamic vinegar (to taste), season with salt and pepper, and serve immediately.
*Serves 2-4 as a side dish

Friday, January 22, 2010

recipe: winter herbless pesto

As you may have noticed, I haven't written nearly as much over the past few months, and the recipes I've published are quite spartan. This is because we had our second child, a boy, in October, and it's hard enough to cook something healthy, much less write about it. However, I am learning a lot about (and practicing) fast, wholesome, winter meals, such as the broiled eggs I wrote about earlier this month. Some people fall to convenience foods during such times, but I choose to strip down my cooking even more.

Yesterday I think I perfected what may be the perfect two-young-children-cold-winter-weeknight-that-you-could-still-serve-company meal: pasta with an herbless pesto sauce. One of the many challenges of cooking with small children is a sudden decrease in trips to the co-op. Combine that with a lack of fresh local produce, and one begins to find new romance in the pantry. After you make this one time you'll be able to make it blindfolded, without a recipe or planning.

Ingredients

  • 1 pound dried pasta (whole wheat spaghetti or penne taste great with this)
  • 1 large garlic clove
  • 1/4 lb parmesan or other hard cheese, plus more for grating
  • 1 heaping cup of walnuts, toasted
  • 1/2 cup olive oil
  • 1 tsp dried oregano
  • 1 tsp coarsely ground black pepper
  • pinch of sea salt
Techinique
  1. In the small bowl of a food processor, fitted w/ a blade attachment, combine garlic, cheese, walnuts, oregano, pepper, and salt. Pulse until the mixture resembles coarse breadcrumbs.
  2. Turn the food processor on and add olive oil until mixture resemles an oily paste (much like basil pesto).
  3. Cook pasta, drain, and toss briefly with the pesto sauce. Top individual plates with grated cheese.
*Serves 4 as a main dish or 6 as a first course.

Saturday, January 9, 2010

broil your eggs for a change

The word "broiled" isn't the finest or most elegant, but the eggs that result from this recipe surely are, with very little effort. This is a great recipe for house guests, or a leisurely brunch with your mate sans children (although, kids like these eggs, too). I found this recipe in Ina Garten's Barefoot in Paris cookbook, which I received as a gift from a good friend who also loves to eat. It's a very concise book that serves as a thoughtful introduction to French cooking, with an emphasis on simple, beautiful food, such as this dish.

As with most egg recipes, the key to this one is timing. The cooking times listed below work well for my oven and baking dish, but it will take you a few tries to perfect this recipe. The good news is that these eggs still taste good slightly overcooked, so don't worry if you miss the mark. It's also critical to use the best eggs you can find, since there isn't much else in the dish - 99 cent CostCo eggs will taste like 99 cents.

ingredients

  • 8 very fresh, large eggs (organic, free range if at all possible)
  • 1/2 garlic clove, minced with a knife (don't use a press, as it will taste too strong)
  • 1/2 cup finely (and freshly) grated super-hard cheese, such as Parmigiano-Reggiano
  • 1 tablespoon fresh herbs, minced (thyme, rosemary, basil, or parsley work well)
  • 2 tablespoons cold butter
  • 1/4 cup heavy cream
  • kosher salt and black pepper
  • 8 slices of crusty bread (toasted or warmed)
equipment
  • 4 small gratin dishes (just large enough to hold 2 eggs) or a ceramic/glass baking dish (large enough so that 8 eggs are about 1.5 inches deep).
*I use a baking dish because I don't have gratin dishes, so the process and timing described below may not work as well for several smaller dishes.

technique
  1. Preheat your oven using the broil setting (Note: my oven has a drawer-style broiler, below the main oven space. When I set it to broil the drawer and oven heat up, which is useful in this recipe.)
  2. Using a fork, mix the garlic, herbs, and cheese in a small bowl until well combined.
  3. Liberally grease the gratin dishes or baking dish with some of the butter. Pour in the cream so that it covers most of the bottom of the dish. Cut the remaining butter into small pieces and scatter these around the baking dish. Place the dish in the oven and heat until the cream begins to bubble and brown slightly around the edges, about 5 minutes. Remove from the oven and place on stove top.
  4. Carefully crack the eggs into the dish so that the yolks remain whole. Try to keep them evenly dispersed. Sprinkle them with salt, pepper, and the cheese/herb/garlic mixture.
  5. Place the dish in the oven and bake for about 5 minutes, or until the whites begin to set up but the yolks and tops of the eggs are still liquid.
  6. Move the dish into to the broiler drawer and cook 2-4 additional minutes, or until the top has browned slightly, the eggs are somewhat firm (it's good if the whites are a bit runny), and the yolks are still soft (some yolks may be softer than others - that's ok). This is the part of the recipe that takes the most practice, as it's really a visual judgment. Keep in mind that the eggs will continue to cook in the hot dish after you remove them from the broiler, so use a knife to see how thorough they're cooked and check them again after resting on the counter top for a few minutes.
  7. To serve, use a knife to cut eggs into sections and use a spatula to gently place them on plates with the bread on the side.
*Serves 4 people

Tuesday, December 15, 2009

easy charcuterie: dry-cured duck breast

Do you like cured hams? I like cured hams. Prosciutto, Serrano, Bayonne. Salty, sweet, funky hams. Unfortunately for the home charcutier, a good aged ham requires about a 20 pound hog leg and at least six months of time - not to mention a climate controlled drying chamber. However, one can apply the same concept to a simple boneless duck breast, either wild or farm raised. Duck meat, especially the breast, has an exquisite earthy sweetness that shines after a good curing.

Several years ago I stumbled across a very simple cured duck breast recipe in Mario Batali's Babbo cookbook. Just pat it dry, roll it in salt and spices, and hang for about 10 days. I've been waiting for a surplus of duck to use for this recipe, but I only hunt waterfowl a few days per season, so I've never had more than one or two birds to eat. This year the waterfowl hunting gods blessed me with a very fast morning, so it seemed like a good time to cure some duck. The results were quite tasty.

I'm guessing wild goose would work equally well, perhaps even better given its larger size and thickness. In fact, Hank Shaw has a tantalizing recipe for this on his fantastic wild cookery blog.


Recipe: Dry-Cured Wild Duck Breast

Ingredients

  • 2 split wild duck breast (4 pieces)
  • 4 tablespoons kosher salt
  • 3 tablespoons freshly ground black pepper
  • 1 tablespoon sugar
  • 1 tablespoon hot red pepper flakes (use less if you can't handle heat)
  • 1 tablespoon chopped thyme leaves
Technique
  1. In a small bowl, combie the salt, pepper, sugar, red pepper flakes, and thyme. Coat the duck breast with this mixture, wrap it loosely in wax paper and refrigerate for 2-3 days.
  2. Unwrap, wipe off most of the seasoning. Punch a small hole on one end of the breast and tie a length of twine long enough to hang from your cool basement ceiling or refrigerator shelf.
  3. Hang the breast in a cool, dark, semi-humid place (an unfinished basement in winter works well) for 1-2 weeks, or until the breast shrinks to nearly half its original size and feels quite firm to the touch. When sliced, the breast should be wine colored and have a nice, hammy chew.
Serve the duck sliced very thin with cocktails on a salumi plate or as part of a creative first course - Mario Batali likes it with white beans.

Wednesday, November 18, 2009

woodcock: the other red meat.

Minnesota is a blessed place for a number of reasons, including an abundance of native wildfowl. Most people have heard of ruffed grouse, but what about Scolopax Minor, the noble woodcock? I recently heard a wonderful NPR interview with Clotilde Dusoulier, a young Parisian food blogger who translated Je Sais Cuisiner, an epic French cookbook, into English. I don't yet have this book but it has since risen to the top of my personal Christmas gift list. During the interview Clotilde describes how the book was intended to help a new bride cook simple, traditional French food for her new family. Among other interesting bits, she mentions that the author included recipes for some obscure dishes, some of which include wild game, because the polite cook must know what to do with a delicious wild boar or woodcock if an uncle happens to leave one at the house. You should be so lucky.

Woodcock is perhaps the most fleeting of Midwestern delicacies. Each fall, the mysterious upland birds migrate from the Northern US (mainly the Upper Midwest and New England) and Canada to the Southern states for the winter. Native Minnesota birds can be found throughout October, but large concentrations of migratory birds are only in the state for 2-3 weeks, depending on the weather, which adds to their allure as game. Their bodies are about the same size as a quail but they have a long neck, large black eyes, and a long pointed beak designed to dig in the soil for earthworms. With a taste that loosely resembles wild duck, Woodcock are truly glorious if roasted simply in a hot oven. To fully appreciate the mystique and obsession surrounding la bécasse, particularly in Europe, I recommend reading this web page. Not surprisingly, the French are the most rabid fan club, but Woodcock also are held in high esteem in the UK.

There are a few classic preparations for woodcock, most of which are mentioned in the Larousse Gastronomique. This is a variation on one of the most typical techniques.

Ingredients

  • 1 whole woodcock, plucked
  • 4 tablespoons of delicious butter, softened
  • coarse sea salt (French grey is very good for this)
  • coarsely ground black pepper
  • 1 tablespoon olive oil
  • 1/2 cup of equally scarce red wine
  • 6-8 baguette slices
Technique
  1. Preheat oven to 400 degrees. Smear the inside and outside of the bird with 2 tablespoons of the butter, making sure the breasts are well coated. Sprinkle generously with salt and pepper, again, inside and out.
  2. Heat the oil in a small heavy-bottomed sauce pot over medium heat. When it begins to smoke, add the bird and brown on all sides (about 5 minutes total).
  3. Transfer the pot to the oven and roast 10-15 minutes, or until the bird is golden brown, and the inside is hot to the touch. Important: Like duck, woodcock must be served rare or medium rare to retain its wonderful texture and flavor. The breast should be blood red when you slice it, but not cold (it's not sashimi).
  4. Put the bird on a cutting board to rest. Pour out all but one tablespoon of the fat in the pot and heat the pot over medium flame. Deglaze the pot with the wine, making sure to scrape everything tasty off the bottom. Let the wine reduce to a light, syrupy sauce. Then remove from heat, whisk in the butter, and check the seasoning.
  5. Pull the legs off of the bird and eat them while you finish the dish (with a fat glass of wine).
  6. Remove the breasts from the carcass and slice them thinly. Top the baguette slices with the sliced meat, drizzle with sauce, and sprinkle with a pinch of sea salt.
*This makes 6-8 canapés to share, or a small meal for one.

A dish this special deserves an equally special wine. The French recommend a big, bold, dry red wine. I don't argue with them. There is even a French vineyard, Domaine de la Mordorée (Chateauneuf-du-Pape), that celebrates the elusive woodcock on its bottle labels. I drank this with a woodcock I ate last year and I won't ever be the same.

Friday, September 11, 2009

reicpe: french tomato salad

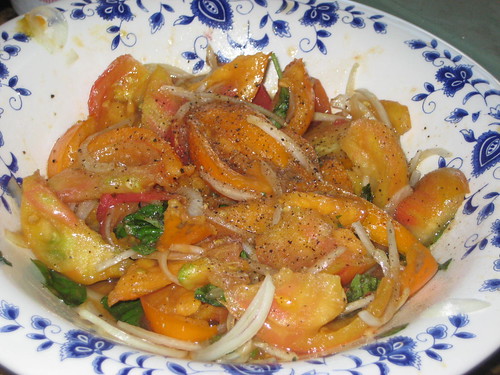
During the juicy splendor of late summer/early fall, insalata caprese is often the default mode of consumption for fresh slicing tomatoes. It is a truly wonderful salad. However, to add some variety to your repertoire, culturally and technique-wise, try this minimalist French version, which is more or less the same recipe that appears in Anthony Bourdain's Les Halles cookbook.

recipe: french tomato salad (salade des tomates)
*Serves 4 as a first course salad, or 6 as a side.

ingredients:

  • 2 lbs perfectly ripened heirloom tomatoes (don't mess around)
  • 2 shallots or one very small onion, sliced paper-thin
  • handful of basil or parsley leaves, cut into chiffonade
  • 1 garlic clove, slightly smashed
  • very coarse sea salt (fleur de sel would shine here)
  • coarsely ground black pepper
  • strong tasting olive oil (my new favorite is Napa Valley Naturals)
technique:
  1. Using a very sharp chef's or tomato knife (I'm not a fan of specialty knives, but this is a useful one), cut the tomatoes in half, remove the cores, and slice the halves into wedges.
  2. Place tomatoes in a large colander (positioned over a bowl or the sink) and sprinkle with a good amount of salt (a word of caution: salt preferences vary, and you will brush some of it off later, but don't go overboard the first time you make it. You can always add more salt before serving). Let them sit at room temperature for 10-20 minutes. Water and seeds will begin to drain through the colander.
  3. Put the sliced shallots or onions in a small bowl and sprinkle with salt. Let them sit with the tomatoes.
  4. Remove tomato wedges from the colander, scraping any loose seeds out with your fingers, and put them in a wide, shallow serving bowl or dish. You also can brush off any large granules of salt.
  5. Add sliced onion/shallot to the bowl, brushing off any excess salt.
  6. Add the basil and drizzle everything with a generous amount of olive oil. Then drizzle with a smaller amount of vinegar. The key here is to minimize the amount of liquid in the salad, as you want the flavors to be intense. The tomatoes should absorb most of the oil and vinegar, and release a minimal amount of juice into the bowl.
  7. Toss lightly with a spoon, top with black pepper, check seasonings, and serve.

Wednesday, September 2, 2009

reinvent your appetite: the relative value of local food

Last week, the Minneapolis Star Tribune contained a short article about the cost of eating as a locavore - "Making the local food movement accessible." Written by Hayley Tsukayama, a grad student, the piece describes how the author seeks to eat more local foods but also maintain a trim grocery budget. Here's an excerpt:

"I was so excited that I forgot a key fact: I'm a single, omnivorous graduate student who normally buys groceries at Wal-Mart. And while the local produce at most farmers' markets is the same price or cheaper than at supermarkets, the meat is far more expensive. I believe that good food is worth the higher prices, but after rent and student loans it's hard to finance a foodie habit."

I'll start by saying that I'm not a big fan of the word "foodie." In a creepy way, it reminds me of the Crucible-era word "goody." Besides, it's too cute, and helps stoke the fire that enjoying high quality food is somehow elitist. By our pitiful standards of nutrition, anyone living in rural France or Italy would be a foodie - "those people make their own pesto!" As an unhealthy society, we should shun these words in favor of "healthy," "high quality," or "whole" foods, prepared from scratch (either at home or at a restaurant). Perhaps the verb "to cook" could see a renaissance.

Enough semantics. What I find interesting about this article is the frequent supposition that "going local" is simply a matter of plugging local products into the American discount "menu" and Walmart "more for less" value equation. Quite literally, we're looking at apples and oranges; or rather, locally-grown Minnesota apples (eaten in season) and dry, industrial orange-like organisms.

Eating healthy, delicious, simple food is possible at any budget. Rural, agrarian communities around the globe have demonstrated this for hundreds of years. In my opinion, one of the biggest issues is that many Americans are reluctant to adopt a healthier, more sustainable diet because it requires eating different foods and much less of certain things, such as meat.

For example, Americans eat a lot of bacon and pork chops. When you make the decision to eat local, pasture-raised pigs that are humanely treated and minimally processed (with care), it will cost more than buying a frozen mass of industrial chops from a huge company. Get over it. What this means is that you may only be able to eat pork chops once a month rather than every Wednesday. The same is true for bacon. At $1.99/pound for industrial bacon, the average person could eat bacon every morning and not go broke. Spend more on some high quality bacon and eat just a few slices on the weekend with pancakes or dice and toss it with pasta. It is time for Americans to revere high quality meat as a precious, scarce delicacy.

The same is true for other parts of the American meal. Bulk, organic oatmeal is very affordable. So is polenta. Dried pasta and rice have kept people satisfied and proud of their food culture for centuries. Remember your grandma's beef stew recipe or your aunt's green curry recipe? Perhaps it is time to rediscover these simple foods as the basics, and combine them with small amounts of more costly ingredients, such as meat, cheese, butter, milk, and olive oil. Throw some seasonal vegetables in a salad or on the side and you will enjoy a trim grocery budget, better tasting meals, and a higher quality of life. I promise.

In the author's defense, the people she interviewed suggested some novel, paradigm-shifting habits, such as eating less meat, so the article does offer some thoughtful perspective from different people who do know something about this. It also generated a number of comments - take a look.

Friday, August 21, 2009

anti-recipe: f'in simple avocado hors d'oeuvre

Rule #1: Don't freak out about hosting friends or family for dinner. Your boss, priest, or Secretary of Defense? Sure. Your best friends? Non.

Rule #2: Cooking and eating are fun, so enjoy the process as well as the results.

Rule #3: Make something that is easy. This will give you more time to clean your bathroom and have an apéritif prior to your guests' arrival. Both of those things are important. This avocado dish is good practice.

I first tasted this exquisitely simple creation as a student in southern France. I know, it sounds pretentious, but as a French major it was necessary to learn grammar in person and increase my vocabulary of regional foods and drink. This included, among other adventures, spending a couple weekends at a French friend's parents' home in Landes. Seeing that I am quite a large individual, my friend's mother immediately implied that the size of my appetite must surely equal or exceed that of my physical stature. She was not mistaken.

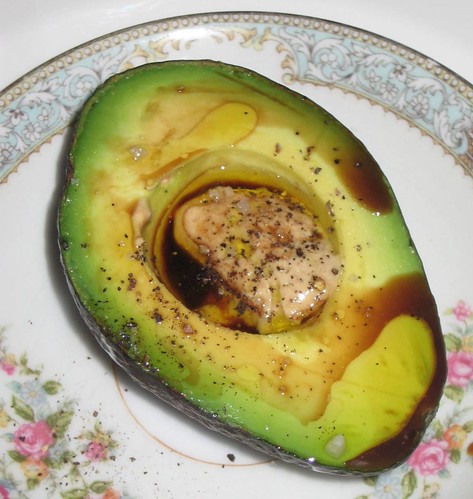
As part of a massive late spring meal, she served avocados, halved lengthwise on small plates. She put a small amount of hot Dijon mustard in the center of each, then drizzled some balsamic vinegar and olive oil, and sprinkled some coarse sea salt and black pepper. Just looking at these made me excited. As a Minnesotan, I was not accustomed to eating many avocados, and surely not as an elegant hors d'oeuvre. Eat them with a small spoon and watch your guests drool.

What is this preparation called, you might ask? I do not know. She may have referred to them as "avocats" (avocados), because French people eat stuff like this every day. Let's give it a sophisticated name, to score you points. How about "avocados balsamiques?"

Saturday, August 15, 2009

recipe: rustic tomato sauce and sausages

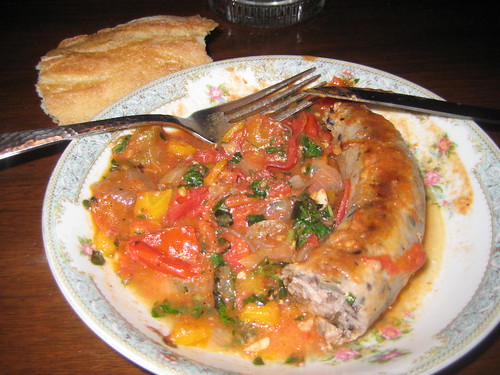
Walking through the White Bear Avenue farmer's market last Wednesday, we found a pile of roma tomatoes for just a few dollars. The heirloom slicing tomatoes in our garden are finally starting to ripen, so it seemed appropriate to use the romas for something cooked. We don't plan meals for the week as well as we should, but in the summer it's usually easy to slap something together with whatever we buy at the market. The following day I remembered reading an easy tomato sauce recipe in Mario Batali's Molto Italiano cookbook (a favorite). This, served with some wild rice pork sausages from Pastures a Plenty and a baguette, turned out to be a great weeknight dinner that also tasted great the following day.

Mario's original sauce recipe is intended for more traditional pasta applications, and calls for canned or skinned/seeded tomatoes, so I cut a few corners to make a more rustic version with chopped whole tomatoes. It's perfect for weeknights or lazy weekends.

rustic tomato sauce and sausages
*serves 4 as a main course or 6-8 as antipasto

ingredients

  • about 2 pounds fresh, locally grown (important!) tomatoes, roughly chopped - if good tomatoes are not available, a high quality canned variety will work
  • 1 onion, diced
  • 1 cup diced carrots (1-2 large, or 4-6 small carrots)
  • 4 cloves garlic, minced
  • 2 cups fresh basil leaves, chopped fine
  • 2-4 tablespoons of other fresh herbs (thyme, rosemary, oregano, parsley, etc.)
  • olive oil
  • hot red pepper flakes (optional)
  • 4 large uncooked pork sausages, dried with a towel, then dredged in flour
technique
  1. over high flame, heat about 1/4 cup of olive oil in a wide skillet until just smoking
  2. sauté onions, garlic, and carrots until soft and translucent (8-10 minutes)
  3. while vegetables are cooking, heat another skillet over high heat with 1 tbsp of olive oil and sear sausages on all sides until deep golden brown (8-10 minutes)
  4. lower heat to medium, add tomatoes and cook until tomatoes are very soft and everything resembles a very chunky sauce (probably 10-20 minutes)
  5. gently lay sausages in the sauce and simmer over low heat for another 10 minutes, until sausages are cooked
  6. after removing sausages from skillet, stir the herbs into sauce (off heat)
  7. plate the sausages, pour some sauce on the side, and drizzle with some oil
  8. serve with bread and a spicy dry red wine


Friday, July 24, 2009

1 chicken = 4 meals - part 3

By now the vivid memories of grilling your chicken have faded. Your kids loved the chicken salad sandwiches, and you enjoyed a cool, simple green salad with chicken. Yet your work with this chicken is not quite complete. More flavor awaits in the picked over carcass that is chillaxin' in your freezer.

Homemade chicken stock is a lot less work than most people think. The ingredients are pantry staples and during summer months, the only challenge is keeping your house from heating up like a kiln. My home has very poor air conditioning, so I tend to make huge batches of stock in fall/winter/spring and freeze it for use throughout the year. If that's your preference, keep a large ziplock bag your freezer to collect chicken carcasses over several months.

As with the other posts in this series, the goal is to create something delicious out of very few ingredients. In this case, squeezing several meals out of one chicken. Rather than give you a soup recipe, I'm posting my favorite risotto recipe, which is truly memorable with the addition of homemade chicken stock.

Homemade Chicken Stock
This recipe appears, almost verbatim, in Mario Batali's Molto Italiano cookbook (the best Italian cookbook I've encountered). It yields approximately 8 cups of stock.

Ingredients

  • 2 tablespoons olive oil
  • bones, wings, and scraps from 2-3 whole chickens (you could cut this recipe in half if you only have parts from one chicken)
  • 3 carrots, coarsely chopped
  • 2 onions, coarsely chopped
  • 4 ribs celery
  • 4 quarts water
  • 2 tablespoons tomato paste
  • 1 tablespoon black peppercorns
  • 1 bunch parsley stems
Technique
  1. In a large heavy-bottomed pot, heat the olive oil over medium-high heat until smoking. Add the chicken parts and brown all over, turning frequently. Transfer the chicken parts to a platter and reserve.
  2. Add the carrots, onions, and celery and cook until softened and browned, about 10 minutes. Return the chicken to the pot and add the water, tomato paste, peppercorns, and parsley, and stir to dislodge the browned bits from the bottom of the pot. Bring to a boil, then reduce the heat and cook at a low simmer for 2 hours, or until reduced by half, occasionally skimming the fat.
  3. Remove from the heat and strain into a large bowl, pressing on the solids with the bottom of a ladle to extract all the liquid. Let cool, stirring occasionally. Cover and refrigerate. For longer term storage, pour cooled stock into 1 quart freezer bags. Layer the bags on a cookie sheet and place in the freezer.

Classic Risotto
This recipe is also the work of Mario Batali. There are thousands of risotto recipes you could try, but why waste your time - this one is the best. Serve it with a salad for a light meal, as a smaller first course, or as a creamy bed of starchiness for a fine cut of meat. By the way, this recipe concludes our epic journey into the frugality and allure of whole-chicken cookery. I hope you enjoyed it. And if you've made any of these dishes, please post a comment!

*One recipe will yield about 4 main course portions or 6 first course portions

Ingredients
  • 8 cups chicken stock, heated until hot
  • 1/4 cup olive oil
  • 1 medium onion, cut into 1/4-inch dice
  • 1 1/2 cups arborio rice
  • 1/2 cup dry white wine (something you would drink - pinot grigio works well)
  • 4 tablespoons unsalted butter
  • 1/2 cup freshly grated Parmigiano-Reggiano (or a high quality domestic equivalent, if you're a disciplined locavore)
  • optional: 1 teaspoon saffron threads (for authentic risotto milanese)
Technique
  1. If using saffron, add it to the hot stock and stir to infuse.
  2. In a 10- to 12-inch sauté pan, heat the olive oil over medium heat until almost smoking. Add the onion and cook until softened and translucent but not browned, 8 to 10 minutes. Add the rice and stir with a wooden spoon until toasted and opaque, 3 to 4 minutes.
  3. Add the wine, then add a large ladleful of the stock and cook, stirring, until the liquid is absorbed. Continue stirring and adding the stock a ladleful at a time, waiting until the liquid is absorbed each time before adding more, until the rice is tender and creamy yet still a little al dente, about 20 minutes (you may have a little stock left over).
  4. Remove the pan from the heat and stir in the butter and Parmagiano until well mixed. Divide risotto among four warmed plates, and serve with additional Parmagiano.
Photo credit: JaseMan on flickr


Wednesday, July 22, 2009

1 chicken = 4 meals - part two

So let's say you've just finished eating a whole grilled chicken. Basking in the glow of your satiated friends, and a couple bottles of Portuguese Alentejo red, don't forget that your work with this chicken is not yet complete. Rather than throw that gnarly-looking carcass in the garbage, wrap it up and put it in the refrigerator for use in one of the following two recipes. Even though you've removed the breasts and legs, that carcass contains a lot of small, tasty morsels of chicken that work perfectly in other dishes. The wings work particularly well for this, if you didn't eat them when the chicken was grilled.

There are certainly more than two ways to incorporate leftover chicken into another meal, but these two recipes are my favorites, are very easy to make (they use kitchen staples), and really showcase the great flavor of grilled chicken.

It requires a bit of time and patience to scrape every bit of chicken from the bones, but it's well worth the effort. Using your perfectly clean hands, pull every visible piece of meat off of the carcass and wing bones. As you pick it clean, make sure you do not include any cartilage, bone fragments, or other tough bits, as they are quite offensive in the mouth. Reserve the stripped carcass and any loose bones. Meal #4 in this series is a risotto made with homemade chicken stock, so unless you're going to use them immediately, put the bones in a freezer bag and save for a rainy day.

Meal #2: Chicken Salad Sandwiches
The individual amounts of each ingredient varies widely, depending on how much chicken you have. Fortunately, it's easy to make these according to your tastes, so combine ingredients incrementally, to make sure it has the right flavors and consistency.

Ingredients

  • leftover grilled chicken, chopped into small pieces
  • high quality mayonnaise (if you don't make your own, try Mrs. Clarks, from Iowa)
  • minced onion or scallions
  • Dijon-style mustard
  • fresh herbs (basil, thyme, parsley, etc.)
  • anything else you like (walnuts, anchovies, olives, capers, cornichons, etc.)
  • salt and pepper
  • lettuce leaves
  • bread slices
Technique
Combine all ingredients in a bowl and mix lightly to combine. Be careful not to add too much mayo and mustard too soon, as it will overpower the chicken. The result should be lightly dressed, yet stick together in a spoon.


Meal #3: Green Salad with Chicken
This is a great all purpose salad recipe, that can serve as the basis for many composed dinner salads, including the reknowned salade nicoise.

Ingredients
  • leftover chicken, chopped into small pieces
  • fresh field greens or lettuces
  • parmesan shavings (use a vegetable peeler)
  • walnuts
  • olive oil
  • red wine vinegar
  • dijon mustard
  • 1 garlic clove
  • sea salt
  • pepper
Technique
  1. Make the vinegrette dressing. The exact proportion of vinegar to oil varies according to the type of vinegar used, and your own palate, but a general rule is 2 parts vinegar to 1 part oil. Smash the garlic clove with your hand or a chef's knife and place in a small cup/bowl. Add a small amount of red wine vinegar and set aside for 15-30 minutes. Then add 1 teaspoon mustard and whisk vigorously. Then slowly drizzle olive oil into vinegar (while whisking quickly) until desired consistence/taste is achieved. Set aside. (Note: you may need to increase the amounts if you're planning to server this salad to more than just a few people).
  2. Dress the salad. Tear greens into small pieces and place into a large salad bowl. Pour half of the dressing over the greens and toss with salad tongs. Taste some of salad to determine how much more dressing you'll need. An overdressed salad can be soggy and overly acidic, so it helps to add the dressing in two rounds.
  3. Pile the dressed greens on plates, and top with chicken, nuts, and parmesan shavings. Grind some pepper and sea salt over the finished salad. Serve with some big hunks of crusty bread for a filling weeknight meal or leisurely weekend lunch.
These recipes are a gateway to stress-free, simple meals that hardly require a recipe or a lot of time. Make them once and you can throw this blog post away forever (but forward it to a friend first). These meals emphasize my approach to cooking for a busy family (mine) - repurposing the leftovers from previous meals by simply adding a few quality ingredients found in most kitchens. The trick is to buy the best ingredients you can afford, as such simple meals will not hide the blandness of industrial chicken or junky vinegar.

Photo credit: protohiro on flickr


Tuesday, July 14, 2009

1 chicken = 4 meals - part one

For centuries, rural cooks have recognized the utility, versatility, and caloric value of eating the whole chicken. While it may seem convenient to buy packaged chicken parts (thighs, breasts, etc.) individually, purchasing a whole chicken is far more economical, and can save you valuable time by serving as the basis for several meals. The economics are quite simple: boneless, free range chicken breasts can run $7-$8 per pound at a co-op or grocery store, but a whole chicken may cost as little as $3 per pound from the same producer, and farmers' market vendors in your area may be selling chickens for even less. If you pay $12 for a 4 pound chicken, you get breasts, legs/thighs, wings, and a carcass for making stock (for only $4 more than just buying the breasts). As an added benefit, whole chickens are "handled" less by the processor, which likely means a lower risk of contamination, and you know all of the parts are from the same healthy-looking bird.

Separating a chicken at home is quite easy, and after you do it a few times it will be second nature. Many food writers have written about how to squeeze several meals out of one chicken, but given the number of tight pocketbooks out there, it seems appropriate to provide another variation on the theme. Here we go.

Meal #1: whole grilled chicken
July in Minnesota is hot, so in the summer I recommend grilling your whole chicken to capitalize on warm sunshine, and keep the heat out of your kitchen. My favorite grilled chicken recipe is "alla diavola," a simple Italian version with lots of garlic and red pepper flakes. I posted this recipe back in June of 2007, but I've pasted it below because I love it that much. Make it! During cooler seasons, meal #1 could be a simple roast chicken, or even a rotisserie chicken purchased from a quality take out place. The recipe below serves 4 people, but will leave little chicken leftover for meal #2. If you have a larger grill, it is possible to prepare 2 chickens, so that is a possibility if you have company or a larger family, and still want leftovers. After eating your grilled chicken, reserve the carcass and any remaining pieces to use in meal #2, which I'll write about in the next post.

*Note: this is an easy recipe to make, but since you have to brine the chicken, I recommend making it for an early weekend dinner. You could skip the brine with good results, but the brine adds another level of juiciness that is worth the extra step.


Chicken and Brine:

  • 2 medium garlic heads
  • 3 bay leaves, crumbled
  • 1/2 cup salt
  • 1 whole chicken (3-4 pounds), butterflied and pounded (see below)
Garlic-Pepper Oil
  • 4 medium garlic cloves, minced or pressed through a garlic press (about 4 teaspoons)
  • 2 teaspoons ground black pepper
  • 2 teaspoons red pepper flakes
  • 1/4 cup olive oil
Other
  • vegetable oil for grill grate
  • 1 lemon, cut into wedges, for garnish
1. TO BUTTERFLY CHICKEN
Use kitchen shears to cut through bones on either side of backbone (see picture in this sequence), then remove and discard backbone. Flip chicken over and use heel of your hand to flatten breastbone. Cover chicken with paper towels to protect skin, then pound flat using meat pounder or rubber mallet.

*Note: This may seem tedious the first time you do it, but you'll get much quicker after making this recipe a few times.

2. TO BRINE THE CHICKEN
Combine garlic heads, bay leaves, and salt in gallon-size zipper lock bag; press out air and seal bag. Using rubber mallet or meat pounder, pound mixture until garlic cloves are crushed; transfer mixture to large container or stockpot and stir in 2 quarts cold water until salt is dissolved. Immerse chicken in brine and refrigerate until fully seasoned, about 2 hours.

3. FOR THE GARLIC-PEPPER OIL
While chicken is brining, heat garlic, black pepper, pepper flakes, and oil in small saucepan over medium heat until garlic is fragrant and sizzling and mixture registers about 200 degrees on instant-read thermometer, about 3 minutes. Remove from heat and cool to room temperature, about 40 minutes. Measure 2 tablespoons garlic-pepper oil into 2 small bowls and set aside.

4. TO FLAVOR THE CHICKEN
Remove chicken from brine and thoroughly pat dry with paper towels. Loosen the skin around the breast and thighs. Apply two tablespoons of the pepper oil underneath the loosened skin.

5. TO GRILL THE CHICKEN
Ignite about 6 quarts (1 large chimney, or about 6 pounds) charcoal briquettes and burn until covered with thin coating of light gray ash, about 20 minutes. Empty coals into grill and bank half of coals on either side of grill, leaving midsection of grill free of coals. Position grill grate over coals, cover grill, and heat grate until hot, about 5 minutes; scrape grate clean with grill brush. Lightly dip small wad paper towels in vegetable oil; holding wad with tongs, wipe grill grate. Position chicken skin-side down on grill grate over area with no coals; cover grill and fully open lid vents.

6. TO SERVE
Cook until instant-read thermometer inserted into thickest part of thigh registers 170 to 175 degrees, 30 to 45 minutes. Transfer chicken to cutting board; let rest 10 minutes. Carve chicken into four pieces, drizzle with remaining pepper oil and garnish with lemon wedges.

*Serve with a bold, spicy red wine, such as those coming from Portugal at the moment (watch this for ideas).
*For a quick side, place some fresh vegetables over the coal banks on each side of the grill during last 10 minutes of cooking.

*This recipe appeared in its entirety in the July/August 2003 issue of Cooks Illustrated


Photo credit: Machine is Organic on flickr

Thursday, June 18, 2009

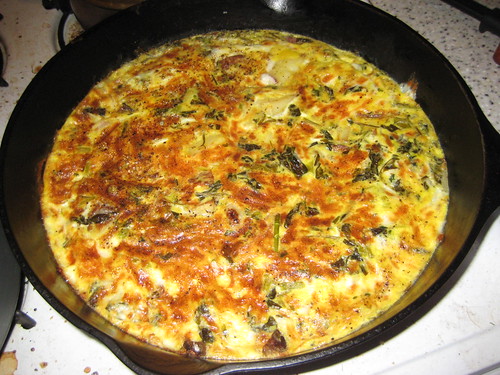
the humble frittata

Peasant cooking at it's best, many cookbook authors and magazine writers have touted the simplicity of this Italian staple. Nearly identical to the Spanish tortilla, the frittata is the ideal vehicle to dispose of leftover vegetables and other items languishing in your fridge. It is also an ideal summer meal, as it requires just a few minutes in the broiler and tastes great the following day, even served cool or at room temperature. Many variations exist, but core elements include sauteed vegetables, cheese and/or cream, and at least six eggs. The recipe below is a hybrid of several recipes that is easy to prepare and works well for me. I've listed some suggested ingredients but this dish is so flexible that I strongly encourage using nearly any ingredient that would taste good with eggs. Bacon is quite tasty, as well as leftover roast turkey or chicken.

Ingredients

  • 6-8 eggs, depending on the size of your skillet and appetite
  • 1/2 cup milk or cream
  • 1/2 onion
  • 1/2 lb mushrooms, quartered (or other vegetables)
  • 2 tablespoons minced fresh herbs (parsley, basil, or thyme)
  • 1 cup grated cheese (parmesan, mozzarella, or chevre work well)
  • 4 tablespoons olive oil
  • kosher salt and coarsely ground pepper
Equipment
  • large, well seasoned cast iron or stainless steel skillet (you could use nonstick but I don't recommend it because of new research regarding toxins) - make sure the skillet has a metal handle, as it will go in the broiler
  • oven with a broiler
Technique
  1. Preheat your broiler. Heat two tablespoons of oil in the skillet over medium-high heat. When oil is nearly smoking, add the onions and mushrooms. Sauté them until the mushrooms have released their juices and the liquid has evaporated from the pan (10-15 minutes).
  2. In a large bowl, combine eggs, cream/milk, and herbs. Beat vigorously with a whisk or fork for several minutes (this will make the frittata fluffy).
  3. Lower the heat to low, stir in remaining olive oil, and pour the egg mixture in the skillet. Lightly stir eggs to incorporate sautéed vegetables.
  4. Once the eggs at the bottom have started to firm up, add the cheese and fold it into the egg mixture that is still liquid.
  5. Put the skillet in the broiler and cook for 3-6 minutes or until the top is lightly browned and the eggs are no longer runny (but do not overcook).
  6. Remove from broiler, sprinkle with salt and pepper, and slice into wedges.
  7. Drizzle with additional olive oil if desired.
*Serves 4 as a main event or 6 as a first course

Monday, June 15, 2009

another way to make potatoes on the grill

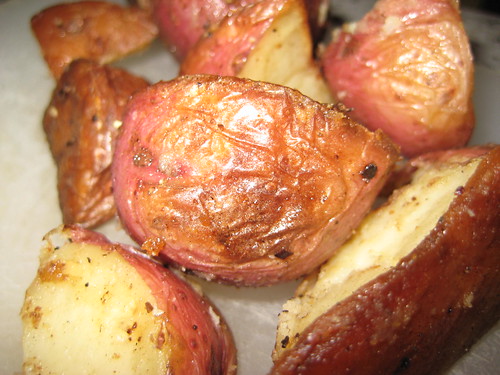
Fried potatoes are delicious and fast, but the thought of heating up the kitchen on a punishingly hot day makes me want to vomit, seriously. Some of you might remember that last summer I posted a recipe for roasted potatoes on the grill. While that version is delicious in its own right, the indirect grilling method requires at least 30 minutes to fully cook the potatoes. In an effort to create a more weeknight friendly version, I developed another recipe inspired by a recent Mark Bittman article about grilling over wood coals, in which he describes how one of his friends uses a cast iron griddle to sear foods over hot coals.

I applied this technique to quartered new potatoes, and the results exceeded my expectations. A screaming hot skillet, combined with the ambient heat from a covered grill, resulted in potatoes that were crispy on the outside, creamy within, and subtly infused with smoky goodness.

ingredients

  • 2.5 pounds small red new potatoes, quartered or cut into 1 inch pieces (I'm sure other small potatoes would work well)
  • 8 large garlic cloves
  • high quality olive oil (4 tbsp)
  • sea salt
  • black pepper
equipment
  • large cast iron skillet
  • a round metal tray, tin foil, or something that will loosely cover the skillet
  • charcoal grill
technique
  1. Ignite a full chimney of charcoal.
  2. While charcoal is heating, pour olive oil into cast iron skillet.
  3. Once coals are hot, pour them in a thick layer over 1/2 of the grill. Place the skillet on the grill grate, cover, and heat until oil is smoking.
  4. Add potatoes, loosely cover the skillet, and cover the grill.
  5. Cook for 10 minutes, then check potatoes for browning.
  6. If the bottom sides are golden brown, flip potatoes with a spatula to brown remaining sides, and add garlic cloves. Cook 10-15 minutes longer.
  7. Once potatoes are brown and crispy, remove from heat, toss w/ salt and pepper, and serve immediately.
*Serves 4 people.
*Cooking time is highly variable based on the amount of coals used, type of skillet, etc., but this is a good guide.

Monday, April 6, 2009

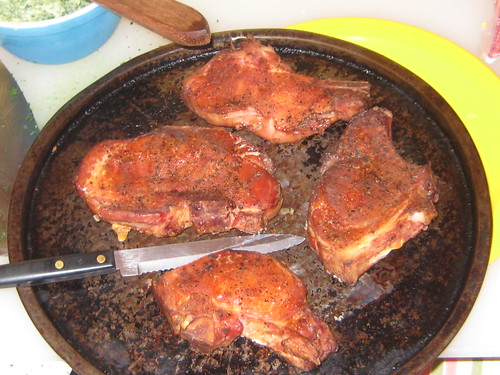
slow and easy food: hot-smoked pork chops

In case you don't follow my dorky tweets about food, you should, because Saturday I posted my first ever live-tweeted recipe and cooking session (see chronology and photos): smoked pork chops! These are so easy, and the flavor will detonate your taste buds. Not surprisingly, it's quite difficult to capture ingredient lists and measurements in 140 characters, so I've posted the full recipe here.

ingredients:

  • 4 thick cut, free range, well marbled pork chops from a local farm (MN-folk should try Pastures a Plenty or Prairie Pride), about 8 oz per chop
  • 1/2 gallon cold tap water
  • 3/4 cup kosher salt
  • 1/2 cup sugar
  • 4 tsp pink curing salt (to buy)
  • 2 garlic cloves, peeled and slightly smashed
  • 2 tbsp chili powder
  • 1 tbsp paprika
  • 1 tsp ground black pepper
  • wood smoking chips (apple wood, hickory, etc.), soaked in warm water
to brine chops:
  1. In a large, non-reactive bowl, place water and pork chops
  2. Run about 1-2 cups of very hot tap water into a smaller bowl
  3. Add kosher salt, sugar, curing salt, and garlic to hot water in small bowl. Stir with a fork until salt and sugar is dissolved.
  4. Pour this mixture into the large bowl and refrigerate for 4-12 hours.
  5. When ready to cook, remove chops from brine and pat dry.
to smoke chops:
  1. Mix remaining spices in a small bowl and apply to all sides of pork chops. Let chops sit on the counter for 30-60 minutes to come to room temperature.
  2. Light about 1/3 of a chimney starter loaded with charcoal briquettes (wood/lump charcoal burns too hot/fast for smoking).
  3. Bank coals on one side of your grill, put the wood chips on top (ideally in a smoker box or wrapped in a foil packet), and place a small pan on the bottom of the grill opposite the coals.
  4. Place pork chops on the grate opposite the coals. Cover and begin smoking.
  5. After about 1 hour, add 10 unlit charcoal bricks to the top of the pile. Cover and continue smoking.
  6. Chops will be ready approximately 1-2 hours later, depending on the temperature inside and outside of the grill. They should be a dark red-orange w/ and be very tender (slight charring on the edges is ok, too).
  7. Rest chops for 5 minutes before serving.
*Serves 4 people

These go really well with a strong beer, some fried or roasted potatoes, and a green salad. Sauerkraut is also an excellent choice, especially in winter.

Monday, March 16, 2009

buy hydroponic. lettuce.

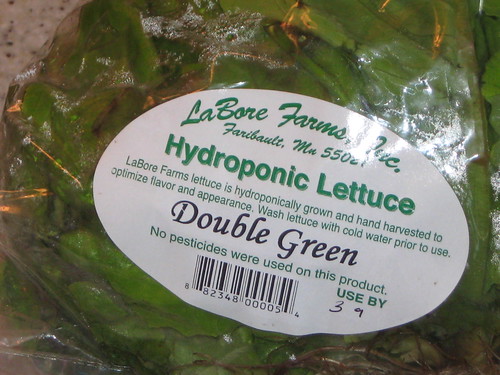
I've had it. I'm not going to buy lettuce from California any more. Picture this: A small head of green lettuce grows in the dirt for many weeks. The lettuce, which is about 95% water, is then picked, washed, and placed in a huge box with hundreds of other heads. The box is placed on a semi trailer with many other boxes of lettuce. The truck drives from some town in California's central valley to St. Paul, MN, where some dude unloads it into the storage room of a grocery store, and someone else puts it in the produce section. Then someone drives to the store to buy it, they return home, and they put it in their refrigerator, where it may wilt before it is ever eaten. This head of lettuce, which, don't forget, is frickin' 95% water, just traveled over 2,000 miles to meet this basic "need." Does that make any sense? It's akin to growing bottles of water iand shipping them thousands of miles to be consumed by someone who already has water. Yes, we do that, too.For that very reason, northern food economies should support more greenhouse and hydroponic produce growers. From May to October, farmer's markets and co-ops carry an excellent assortment of locally grown, outdoor lettuces and leafy greens, but these are clearly not an option in cold months. Hydroponically grown lettuce, by contrast, is extremely versatile because it simply depends on a warm greenhouse and adequate water and nutrients (we have plenty of both in MN, and not so much in CA).

LaBore Farms, a small hydroponic lettuce producer in Faribault, MN recently started selling some value-priced greens at area co-ops and natural foods stores. At approximately $2.99 per bag, these greens are delicious, nutritious and they keep longer in your refrigerator because they only travel about 50 miles to a St. Paul store, vs. the epic transcontinental journey described above. Read more about hydroponic agriculture.

Wednesday, February 18, 2009

saucisson update: fully cured and edible! (sort of)


At long last, I decided to eat one of my saucissons. In my last update I decided to let them cure a bit longer to make sure the interior of the sausage was fully cured. The big day was last Wednesday - I've been so busy with work and a toddler daughter that I haven't been able to post about it yet.

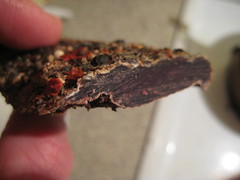
The good news is that the saucissons are fully cured (no raw meat in the middle), but as feared, I think the outside cured too fast given the low humidity level in my basement during the month of January. The resulting saucisson is edible, as I ate several pieces and did not puke or die, but the interior does have a slightly brownish tint which indicates that the exterior dried too fast (this is visible in the photo above). I don't think the interior rotted, because it doesn't smell bad, but I do think it wasn't able to dry evenly because the exterior cured too fast. As a result the saucisson has an off taste which isn't exactly delicious.

Rest assured, I will purchase a humidifier and give it another try. In Minnesota humidity levels are higher in the spring, which should also help. We shall overcome.

Saturday, January 31, 2009

great article in Star Tribune about local food trends

In case you missed it, earlier this month the Star Tribune's Nancy Ngo published a great article on food trends for 2009. Among other more trivial bits, such as speculation about Peru becoming the next hip food culture for Americans, the article does highlight some key trends related to home cooking and eating sustainably.

For several authorities, it's a deliberate, unapologetic return to home cooking. In its January issue, Food & Wine magazine names home cooking as the biggest food trend of the year, with an emphasis on retooled comfort food classics, entertaining on a budget and "exotic" recipes made easy.

The National Restaurant Association calls it philosophy-driven choices, this continuing trend toward "green" eating in its many permutations. And the chefs expect to see much more of it. In fact, local produce ranked No. 1 in the What's Hot survey. Nine in 10 chefs said demand for locally grown menu items would increase, along with demand for sustainable seafood, organic produce and free-range meats.


Friday, January 30, 2009

saucisson update: going to wait a few more days

I went down to the cellar last night to check on the salumi and I think they still need some more time. We're well past the three week mark, but when I squeeze them there's still a little too much resistance on the thicker parts. I'll check again on Sunday - be prepared.

Wednesday, January 28, 2009

cabbage soup deserves more respect

When was the last time you ate a bowl of cabbage soup that wasn't borscht? Let's face it: green cabbage isn't sexy. Radicchio is cool because it's small and pretty, and you don't have to say the word cabbage when discussing it. Napa cabbage is a touch more sophisticated because it reminds one of verdant green valleys of vineyards. But ubiquitous green cabbage, my friends, often evokes images of damp medieval huts and grubby serfs, or the funky humid smell that often accompanies over-cooked, mushy renditions of cabbage that misrepresent the beauty and utility of this particular vegetable.

Cabbage soup, in particular, can be extra stinky, so it is often avoided to prevent its unique odors from permeating your house, children, and belongings.

Forget what you just read and try the soup recipe below. It smells great and demonstrates the many reasons one should respect and cherish the simplicity of green/white cabbage, such as:

  1. It tastes great when prepared properly, whether cooked as soup, braised as a side dish, shredded for a salad (think coleslaw), or cured as sauerkraut;
  2. Cabbage is perhaps one of the cheapest vegetables available (often selling for 99 cents per pound or less!);
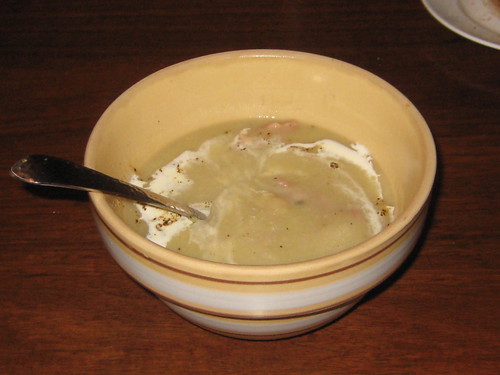
  3. It stores very well in the refrigerator - I harvested the cabbage for the soup in the picture from my garden in early November and didn't eat them until January - they were simply wrapped in plastic in my crisper);
  4. Cabbage is one of the few local vegetables that is available midwinter in Minnesota and other northern states.
This recipe serves 6 as first course or 4 as a main dish.

ingredients

  • 1/2 cup olive oil
  • 1 large green or white cabbage, cored and sliced very thin
  • 3/4 cup white wine
  • 3 large potatoes, coarsely chopped
  • 2 onions, coarsely chopped
  • a pinch of freshly grated nutmeg
  • 6 thick slices of fresh pork belly (or 1 cup cubed bacon or ham)
  • 3 garlic cloves, thinly sliced
  • 1 cup heavy cream
  • salt and pepper
technique
  1. Heat 5 tablespoons of the oil in a heavy dutch oven or soup pot. Add the cabbage and cook, stirring occasionally, for a few minutes, until softened but not colored. Add the white wine, potatoes, onions, and nutmeg and pour in enough water to cover. Add the pork and bring to a boil, then lower the heat, and simmer gently for about 1 hour, until the meat is tender.
  2. Remove the meat with a slotted spoon. Transfer the soup to a blender or food processor and process until smooth. Season to taste with salt and pepper.
  3. Heat the remaining oil in a small skillet. Add the garlic and cook over low heat, stirring frequently, unti it is just beginning to color. If necessary, reheat the soup over low heat to keep hot.
  4. Serve hot in bowls with a swirl of cream and the garlic chips. If using pork belly, place one piece in each bowl or upon a piece of toasted bread. If using ham or bacon, divide evenly among each bowl.
This is a very hearty soup that easily works as dinner with some good bread and a big beer or glass of dry white wine.

Note: I adapted this recipe from Pork & Sons, which I wrote about earlier this week.