Showing posts with label summer. Show all posts

Saturday, January 30, 2010

finally, a dessert recipe: clafoutis

In the minimalistic spirit of many other recipes on this blog, I bring you clafoutis - easily one of my favorite desserts of all time (and the first dessert recipe on HOUSEKEPT). There are only about five ingredients, all of which you should have on hand, so make it this weekend. I had the distinct pleasure of eating copious amounts of this pudding-like dish while studying in Pau, France. My host mother was from Limousin, a rustic region of France known for cherries, porcelain, and beef. At the time I was completely unaware of this wondrous dessert; that is, until my host mother prepared two of these in late spring when cherries are in season. Essentially a baked custard-like cake, clafoutis tastes a lot like a very thick crepe mixed with fresh cherries.

Clafoutis embodies what a rustic, homemade dessert should be - the effortless combination of a few pantry staples (sugar, eggs, and flour) and ripe, seasonal fruit. Because you mix the fruit into the batter, almost any fruit will work well. Countless cookbooks contain variations on the classic cherry version, but the most common other fruits would be berries, stone fruit (peaches, nectarines), or pears. The traditional recipe calls for kirsch, a cherry-based spirit, but you could also use cognac, armagnac, bourbon, or some other digestif-type booze. Now for the recipe...

After making clafoutis from quite a few different recipes, I think Anthony Bourdain came the closest to what I ate in France (though I really should ask my host mother) in Les Halles, his manifesto of a cookbook. As a stickler, he uses weight instead of volume for the dry ingredients, but you should be able to convert these quite easily. I made it with pears recently, but the same recipe works well for a number of different fruits.


Ingredients
  • 1.5 lbs cherries or other fruit
  • 3 ounces booze (kirsch, cognac, etc.)
  • 1 tbsp butter
  • 4 oz sugar
  • 6 eggs
  • 4 oz flour
  • 1 tsp vanilla extract
  • 1 tbsp confectioners' sugar
Technique
  1. Place the cherries in a bowl and toss with the kirsch. Let macerate for 1 hour.
  2. Preheat the oven to 450 degrees F. Grease a 9-10 inch baking dish with the butter and coat with a pinch or two of the sugar. Place the dish in the refrigerator.
  3. In a large mixing bowl, beat the eggs with a whisk, then add the sugar and beat well to fully incorporate.
  4. Mix in the flour and the vanilla, stirring enough so that all the ingredients are homogenous but without overworking the flour.
  5. Using a rubber spatula, fold the cherries and their accumulated juice into the flour and egg mixture, then pull your dish out of the fridge and turn the mixture into it. Bake in the oven for about 40 minutes, or until a golden brown crust has formed on top. Also, a toothpick inserted into the center should come out clean - no wet.
  6. Dust with confectioners' sugar and serve warm or at room temperature.

Saturday, January 9, 2010

broil your eggs for a change

The word "broiled" isn't the finest or most elegant, but the eggs that result from this recipe surely are, with very little effort. This is a great recipe for house guests, or a leisurely brunch with your mate sans children (although, kids like these eggs, too). I found this recipe in Ina Garten's Barefoot in Paris cookbook, which I received as a gift from a good friend who also loves to eat. It's a very concise book that serves as a thoughtful introduction to French cooking, with an emphasis on simple, beautiful food, such as this dish.

As with most egg recipes, the key to this one is timing. The cooking times listed below work well for my oven and baking dish, but it will take you a few tries to perfect this recipe. The good news is that these eggs still taste good slightly overcooked, so don't worry if you miss the mark. It's also critical to use the best eggs you can find, since there isn't much else in the dish - 99 cent CostCo eggs will taste like 99 cents.

ingredients

  • 8 very fresh, large eggs (organic, free range if at all possible)
  • 1/2 garlic clove, minced with a knife (don't use a press, as it will taste too strong)
  • 1/2 cup finely (and freshly) grated super-hard cheese, such as Parmigiano-Reggiano
  • 1 tablespoon fresh herbs, minced (thyme, rosemary, basil, or parsley work well)
  • 2 tablespoons cold butter
  • 1/4 cup heavy cream
  • kosher salt and black pepper
  • 8 slices of crusty bread (toasted or warmed)
equipment
  • 4 small gratin dishes (just large enough to hold 2 eggs) or a ceramic/glass baking dish (large enough so that 8 eggs are about 1.5 inches deep).
*I use a baking dish because I don't have gratin dishes, so the process and timing described below may not work as well for several smaller dishes.

technique
  1. Preheat your oven using the broil setting (Note: my oven has a drawer-style broiler, below the main oven space. When I set it to broil the drawer and oven heat up, which is useful in this recipe.)
  2. Using a fork, mix the garlic, herbs, and cheese in a small bowl until well combined.
  3. Liberally grease the gratin dishes or baking dish with some of the butter. Pour in the cream so that it covers most of the bottom of the dish. Cut the remaining butter into small pieces and scatter these around the baking dish. Place the dish in the oven and heat until the cream begins to bubble and brown slightly around the edges, about 5 minutes. Remove from the oven and place on stove top.
  4. Carefully crack the eggs into the dish so that the yolks remain whole. Try to keep them evenly dispersed. Sprinkle them with salt, pepper, and the cheese/herb/garlic mixture.
  5. Place the dish in the oven and bake for about 5 minutes, or until the whites begin to set up but the yolks and tops of the eggs are still liquid.
  6. Move the dish into to the broiler drawer and cook 2-4 additional minutes, or until the top has browned slightly, the eggs are somewhat firm (it's good if the whites are a bit runny), and the yolks are still soft (some yolks may be softer than others - that's ok). This is the part of the recipe that takes the most practice, as it's really a visual judgment. Keep in mind that the eggs will continue to cook in the hot dish after you remove them from the broiler, so use a knife to see how thorough they're cooked and check them again after resting on the counter top for a few minutes.
  7. To serve, use a knife to cut eggs into sections and use a spatula to gently place them on plates with the bread on the side.
*Serves 4 people

Friday, September 11, 2009

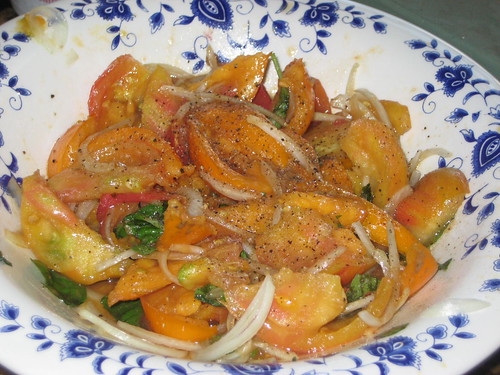
reicpe: french tomato salad

During the juicy splendor of late summer/early fall, insalata caprese is often the default mode of consumption for fresh slicing tomatoes. It is a truly wonderful salad. However, to add some variety to your repertoire, culturally and technique-wise, try this minimalist French version, which is more or less the same recipe that appears in Anthony Bourdain's Les Halles cookbook.

recipe: french tomato salad (salade des tomates)
*Serves 4 as a first course salad, or 6 as a side.

ingredients:

  • 2 lbs perfectly ripened heirloom tomatoes (don't mess around)
  • 2 shallots or one very small onion, sliced paper-thin
  • handful of basil or parsley leaves, cut into chiffonade
  • 1 garlic clove, slightly smashed
  • very coarse sea salt (fleur de sel would shine here)
  • coarsely ground black pepper
  • strong tasting olive oil (my new favorite is Napa Valley Naturals)
technique:
  1. Using a very sharp chef's or tomato knife (I'm not a fan of specialty knives, but this is a useful one), cut the tomatoes in half, remove the cores, and slice the halves into wedges.
  2. Place tomatoes in a large colander (positioned over a bowl or the sink) and sprinkle with a good amount of salt (a word of caution: salt preferences vary, and you will brush some of it off later, but don't go overboard the first time you make it. You can always add more salt before serving). Let them sit at room temperature for 10-20 minutes. Water and seeds will begin to drain through the colander.
  3. Put the sliced shallots or onions in a small bowl and sprinkle with salt. Let them sit with the tomatoes.
  4. Remove tomato wedges from the colander, scraping any loose seeds out with your fingers, and put them in a wide, shallow serving bowl or dish. You also can brush off any large granules of salt.
  5. Add sliced onion/shallot to the bowl, brushing off any excess salt.
  6. Add the basil and drizzle everything with a generous amount of olive oil. Then drizzle with a smaller amount of vinegar. The key here is to minimize the amount of liquid in the salad, as you want the flavors to be intense. The tomatoes should absorb most of the oil and vinegar, and release a minimal amount of juice into the bowl.
  7. Toss lightly with a spoon, top with black pepper, check seasonings, and serve.

Friday, August 21, 2009

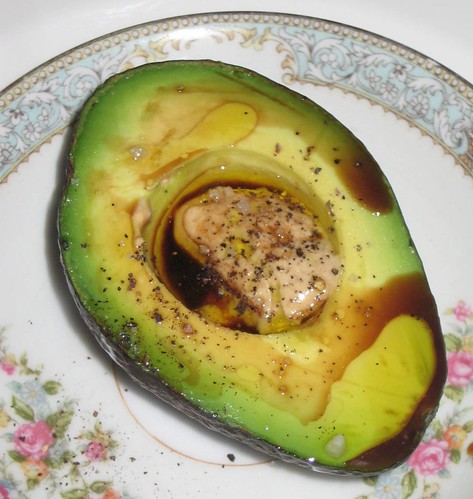
anti-recipe: f'in simple avocado hors d'oeuvre

Rule #1: Don't freak out about hosting friends or family for dinner. Your boss, priest, or Secretary of Defense? Sure. Your best friends? Non.

Rule #2: Cooking and eating are fun, so enjoy the process as well as the results.

Rule #3: Make something that is easy. This will give you more time to clean your bathroom and have an apéritif prior to your guests' arrival. Both of those things are important. This avocado dish is good practice.

I first tasted this exquisitely simple creation as a student in southern France. I know, it sounds pretentious, but as a French major it was necessary to learn grammar in person and increase my vocabulary of regional foods and drink. This included, among other adventures, spending a couple weekends at a French friend's parents' home in Landes. Seeing that I am quite a large individual, my friend's mother immediately implied that the size of my appetite must surely equal or exceed that of my physical stature. She was not mistaken.

As part of a massive late spring meal, she served avocados, halved lengthwise on small plates. She put a small amount of hot Dijon mustard in the center of each, then drizzled some balsamic vinegar and olive oil, and sprinkled some coarse sea salt and black pepper. Just looking at these made me excited. As a Minnesotan, I was not accustomed to eating many avocados, and surely not as an elegant hors d'oeuvre. Eat them with a small spoon and watch your guests drool.

What is this preparation called, you might ask? I do not know. She may have referred to them as "avocats" (avocados), because French people eat stuff like this every day. Let's give it a sophisticated name, to score you points. How about "avocados balsamiques?"

Saturday, August 15, 2009

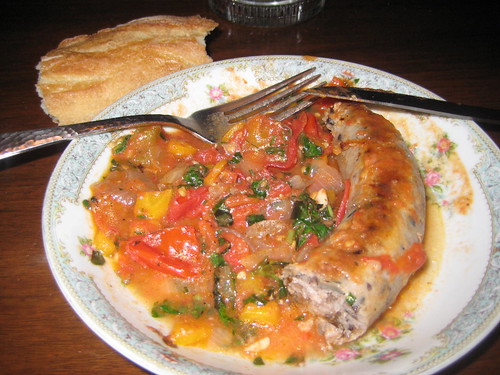
recipe: rustic tomato sauce and sausages

Walking through the White Bear Avenue farmer's market last Wednesday, we found a pile of roma tomatoes for just a few dollars. The heirloom slicing tomatoes in our garden are finally starting to ripen, so it seemed appropriate to use the romas for something cooked. We don't plan meals for the week as well as we should, but in the summer it's usually easy to slap something together with whatever we buy at the market. The following day I remembered reading an easy tomato sauce recipe in Mario Batali's Molto Italiano cookbook (a favorite). This, served with some wild rice pork sausages from Pastures a Plenty and a baguette, turned out to be a great weeknight dinner that also tasted great the following day.

Mario's original sauce recipe is intended for more traditional pasta applications, and calls for canned or skinned/seeded tomatoes, so I cut a few corners to make a more rustic version with chopped whole tomatoes. It's perfect for weeknights or lazy weekends.

rustic tomato sauce and sausages
*serves 4 as a main course or 6-8 as antipasto

ingredients

  • about 2 pounds fresh, locally grown (important!) tomatoes, roughly chopped - if good tomatoes are not available, a high quality canned variety will work
  • 1 onion, diced
  • 1 cup diced carrots (1-2 large, or 4-6 small carrots)
  • 4 cloves garlic, minced
  • 2 cups fresh basil leaves, chopped fine
  • 2-4 tablespoons of other fresh herbs (thyme, rosemary, oregano, parsley, etc.)
  • olive oil
  • hot red pepper flakes (optional)
  • 4 large uncooked pork sausages, dried with a towel, then dredged in flour
technique
  1. over high flame, heat about 1/4 cup of olive oil in a wide skillet until just smoking
  2. sauté onions, garlic, and carrots until soft and translucent (8-10 minutes)
  3. while vegetables are cooking, heat another skillet over high heat with 1 tbsp of olive oil and sear sausages on all sides until deep golden brown (8-10 minutes)
  4. lower heat to medium, add tomatoes and cook until tomatoes are very soft and everything resembles a very chunky sauce (probably 10-20 minutes)
  5. gently lay sausages in the sauce and simmer over low heat for another 10 minutes, until sausages are cooked
  6. after removing sausages from skillet, stir the herbs into sauce (off heat)
  7. plate the sausages, pour some sauce on the side, and drizzle with some oil
  8. serve with bread and a spicy dry red wine


Friday, July 24, 2009

1 chicken = 4 meals - part 3

By now the vivid memories of grilling your chicken have faded. Your kids loved the chicken salad sandwiches, and you enjoyed a cool, simple green salad with chicken. Yet your work with this chicken is not quite complete. More flavor awaits in the picked over carcass that is chillaxin' in your freezer.

Homemade chicken stock is a lot less work than most people think. The ingredients are pantry staples and during summer months, the only challenge is keeping your house from heating up like a kiln. My home has very poor air conditioning, so I tend to make huge batches of stock in fall/winter/spring and freeze it for use throughout the year. If that's your preference, keep a large ziplock bag your freezer to collect chicken carcasses over several months.

As with the other posts in this series, the goal is to create something delicious out of very few ingredients. In this case, squeezing several meals out of one chicken. Rather than give you a soup recipe, I'm posting my favorite risotto recipe, which is truly memorable with the addition of homemade chicken stock.

Homemade Chicken Stock
This recipe appears, almost verbatim, in Mario Batali's Molto Italiano cookbook (the best Italian cookbook I've encountered). It yields approximately 8 cups of stock.

Ingredients

  • 2 tablespoons olive oil
  • bones, wings, and scraps from 2-3 whole chickens (you could cut this recipe in half if you only have parts from one chicken)
  • 3 carrots, coarsely chopped
  • 2 onions, coarsely chopped
  • 4 ribs celery
  • 4 quarts water
  • 2 tablespoons tomato paste
  • 1 tablespoon black peppercorns
  • 1 bunch parsley stems
Technique
  1. In a large heavy-bottomed pot, heat the olive oil over medium-high heat until smoking. Add the chicken parts and brown all over, turning frequently. Transfer the chicken parts to a platter and reserve.
  2. Add the carrots, onions, and celery and cook until softened and browned, about 10 minutes. Return the chicken to the pot and add the water, tomato paste, peppercorns, and parsley, and stir to dislodge the browned bits from the bottom of the pot. Bring to a boil, then reduce the heat and cook at a low simmer for 2 hours, or until reduced by half, occasionally skimming the fat.
  3. Remove from the heat and strain into a large bowl, pressing on the solids with the bottom of a ladle to extract all the liquid. Let cool, stirring occasionally. Cover and refrigerate. For longer term storage, pour cooled stock into 1 quart freezer bags. Layer the bags on a cookie sheet and place in the freezer.

Classic Risotto
This recipe is also the work of Mario Batali. There are thousands of risotto recipes you could try, but why waste your time - this one is the best. Serve it with a salad for a light meal, as a smaller first course, or as a creamy bed of starchiness for a fine cut of meat. By the way, this recipe concludes our epic journey into the frugality and allure of whole-chicken cookery. I hope you enjoyed it. And if you've made any of these dishes, please post a comment!

*One recipe will yield about 4 main course portions or 6 first course portions

Ingredients
  • 8 cups chicken stock, heated until hot
  • 1/4 cup olive oil
  • 1 medium onion, cut into 1/4-inch dice
  • 1 1/2 cups arborio rice
  • 1/2 cup dry white wine (something you would drink - pinot grigio works well)
  • 4 tablespoons unsalted butter
  • 1/2 cup freshly grated Parmigiano-Reggiano (or a high quality domestic equivalent, if you're a disciplined locavore)
  • optional: 1 teaspoon saffron threads (for authentic risotto milanese)
Technique
  1. If using saffron, add it to the hot stock and stir to infuse.
  2. In a 10- to 12-inch sauté pan, heat the olive oil over medium heat until almost smoking. Add the onion and cook until softened and translucent but not browned, 8 to 10 minutes. Add the rice and stir with a wooden spoon until toasted and opaque, 3 to 4 minutes.
  3. Add the wine, then add a large ladleful of the stock and cook, stirring, until the liquid is absorbed. Continue stirring and adding the stock a ladleful at a time, waiting until the liquid is absorbed each time before adding more, until the rice is tender and creamy yet still a little al dente, about 20 minutes (you may have a little stock left over).
  4. Remove the pan from the heat and stir in the butter and Parmagiano until well mixed. Divide risotto among four warmed plates, and serve with additional Parmagiano.
Photo credit: JaseMan on flickr


Wednesday, July 22, 2009

1 chicken = 4 meals - part two

So let's say you've just finished eating a whole grilled chicken. Basking in the glow of your satiated friends, and a couple bottles of Portuguese Alentejo red, don't forget that your work with this chicken is not yet complete. Rather than throw that gnarly-looking carcass in the garbage, wrap it up and put it in the refrigerator for use in one of the following two recipes. Even though you've removed the breasts and legs, that carcass contains a lot of small, tasty morsels of chicken that work perfectly in other dishes. The wings work particularly well for this, if you didn't eat them when the chicken was grilled.

There are certainly more than two ways to incorporate leftover chicken into another meal, but these two recipes are my favorites, are very easy to make (they use kitchen staples), and really showcase the great flavor of grilled chicken.

It requires a bit of time and patience to scrape every bit of chicken from the bones, but it's well worth the effort. Using your perfectly clean hands, pull every visible piece of meat off of the carcass and wing bones. As you pick it clean, make sure you do not include any cartilage, bone fragments, or other tough bits, as they are quite offensive in the mouth. Reserve the stripped carcass and any loose bones. Meal #4 in this series is a risotto made with homemade chicken stock, so unless you're going to use them immediately, put the bones in a freezer bag and save for a rainy day.

Meal #2: Chicken Salad Sandwiches
The individual amounts of each ingredient varies widely, depending on how much chicken you have. Fortunately, it's easy to make these according to your tastes, so combine ingredients incrementally, to make sure it has the right flavors and consistency.

Ingredients

  • leftover grilled chicken, chopped into small pieces
  • high quality mayonnaise (if you don't make your own, try Mrs. Clarks, from Iowa)
  • minced onion or scallions
  • Dijon-style mustard
  • fresh herbs (basil, thyme, parsley, etc.)
  • anything else you like (walnuts, anchovies, olives, capers, cornichons, etc.)
  • salt and pepper
  • lettuce leaves
  • bread slices
Technique
Combine all ingredients in a bowl and mix lightly to combine. Be careful not to add too much mayo and mustard too soon, as it will overpower the chicken. The result should be lightly dressed, yet stick together in a spoon.


Meal #3: Green Salad with Chicken
This is a great all purpose salad recipe, that can serve as the basis for many composed dinner salads, including the reknowned salade nicoise.

Ingredients
  • leftover chicken, chopped into small pieces
  • fresh field greens or lettuces
  • parmesan shavings (use a vegetable peeler)
  • walnuts
  • olive oil
  • red wine vinegar
  • dijon mustard
  • 1 garlic clove
  • sea salt
  • pepper
Technique
  1. Make the vinegrette dressing. The exact proportion of vinegar to oil varies according to the type of vinegar used, and your own palate, but a general rule is 2 parts vinegar to 1 part oil. Smash the garlic clove with your hand or a chef's knife and place in a small cup/bowl. Add a small amount of red wine vinegar and set aside for 15-30 minutes. Then add 1 teaspoon mustard and whisk vigorously. Then slowly drizzle olive oil into vinegar (while whisking quickly) until desired consistence/taste is achieved. Set aside. (Note: you may need to increase the amounts if you're planning to server this salad to more than just a few people).
  2. Dress the salad. Tear greens into small pieces and place into a large salad bowl. Pour half of the dressing over the greens and toss with salad tongs. Taste some of salad to determine how much more dressing you'll need. An overdressed salad can be soggy and overly acidic, so it helps to add the dressing in two rounds.
  3. Pile the dressed greens on plates, and top with chicken, nuts, and parmesan shavings. Grind some pepper and sea salt over the finished salad. Serve with some big hunks of crusty bread for a filling weeknight meal or leisurely weekend lunch.
These recipes are a gateway to stress-free, simple meals that hardly require a recipe or a lot of time. Make them once and you can throw this blog post away forever (but forward it to a friend first). These meals emphasize my approach to cooking for a busy family (mine) - repurposing the leftovers from previous meals by simply adding a few quality ingredients found in most kitchens. The trick is to buy the best ingredients you can afford, as such simple meals will not hide the blandness of industrial chicken or junky vinegar.

Photo credit: protohiro on flickr


Tuesday, July 14, 2009

1 chicken = 4 meals - part one

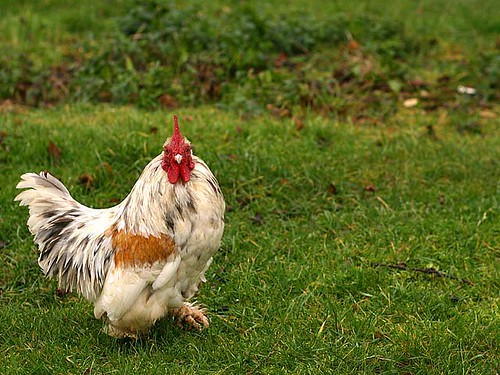
For centuries, rural cooks have recognized the utility, versatility, and caloric value of eating the whole chicken. While it may seem convenient to buy packaged chicken parts (thighs, breasts, etc.) individually, purchasing a whole chicken is far more economical, and can save you valuable time by serving as the basis for several meals. The economics are quite simple: boneless, free range chicken breasts can run $7-$8 per pound at a co-op or grocery store, but a whole chicken may cost as little as $3 per pound from the same producer, and farmers' market vendors in your area may be selling chickens for even less. If you pay $12 for a 4 pound chicken, you get breasts, legs/thighs, wings, and a carcass for making stock (for only $4 more than just buying the breasts). As an added benefit, whole chickens are "handled" less by the processor, which likely means a lower risk of contamination, and you know all of the parts are from the same healthy-looking bird.

Separating a chicken at home is quite easy, and after you do it a few times it will be second nature. Many food writers have written about how to squeeze several meals out of one chicken, but given the number of tight pocketbooks out there, it seems appropriate to provide another variation on the theme. Here we go.

Meal #1: whole grilled chicken
July in Minnesota is hot, so in the summer I recommend grilling your whole chicken to capitalize on warm sunshine, and keep the heat out of your kitchen. My favorite grilled chicken recipe is "alla diavola," a simple Italian version with lots of garlic and red pepper flakes. I posted this recipe back in June of 2007, but I've pasted it below because I love it that much. Make it! During cooler seasons, meal #1 could be a simple roast chicken, or even a rotisserie chicken purchased from a quality take out place. The recipe below serves 4 people, but will leave little chicken leftover for meal #2. If you have a larger grill, it is possible to prepare 2 chickens, so that is a possibility if you have company or a larger family, and still want leftovers. After eating your grilled chicken, reserve the carcass and any remaining pieces to use in meal #2, which I'll write about in the next post.

*Note: this is an easy recipe to make, but since you have to brine the chicken, I recommend making it for an early weekend dinner. You could skip the brine with good results, but the brine adds another level of juiciness that is worth the extra step.


Chicken and Brine:

  • 2 medium garlic heads
  • 3 bay leaves, crumbled
  • 1/2 cup salt
  • 1 whole chicken (3-4 pounds), butterflied and pounded (see below)
Garlic-Pepper Oil
  • 4 medium garlic cloves, minced or pressed through a garlic press (about 4 teaspoons)
  • 2 teaspoons ground black pepper
  • 2 teaspoons red pepper flakes
  • 1/4 cup olive oil
Other
  • vegetable oil for grill grate
  • 1 lemon, cut into wedges, for garnish
1. TO BUTTERFLY CHICKEN
Use kitchen shears to cut through bones on either side of backbone (see picture in this sequence), then remove and discard backbone. Flip chicken over and use heel of your hand to flatten breastbone. Cover chicken with paper towels to protect skin, then pound flat using meat pounder or rubber mallet.

*Note: This may seem tedious the first time you do it, but you'll get much quicker after making this recipe a few times.

2. TO BRINE THE CHICKEN
Combine garlic heads, bay leaves, and salt in gallon-size zipper lock bag; press out air and seal bag. Using rubber mallet or meat pounder, pound mixture until garlic cloves are crushed; transfer mixture to large container or stockpot and stir in 2 quarts cold water until salt is dissolved. Immerse chicken in brine and refrigerate until fully seasoned, about 2 hours.

3. FOR THE GARLIC-PEPPER OIL
While chicken is brining, heat garlic, black pepper, pepper flakes, and oil in small saucepan over medium heat until garlic is fragrant and sizzling and mixture registers about 200 degrees on instant-read thermometer, about 3 minutes. Remove from heat and cool to room temperature, about 40 minutes. Measure 2 tablespoons garlic-pepper oil into 2 small bowls and set aside.

4. TO FLAVOR THE CHICKEN
Remove chicken from brine and thoroughly pat dry with paper towels. Loosen the skin around the breast and thighs. Apply two tablespoons of the pepper oil underneath the loosened skin.

5. TO GRILL THE CHICKEN
Ignite about 6 quarts (1 large chimney, or about 6 pounds) charcoal briquettes and burn until covered with thin coating of light gray ash, about 20 minutes. Empty coals into grill and bank half of coals on either side of grill, leaving midsection of grill free of coals. Position grill grate over coals, cover grill, and heat grate until hot, about 5 minutes; scrape grate clean with grill brush. Lightly dip small wad paper towels in vegetable oil; holding wad with tongs, wipe grill grate. Position chicken skin-side down on grill grate over area with no coals; cover grill and fully open lid vents.

6. TO SERVE
Cook until instant-read thermometer inserted into thickest part of thigh registers 170 to 175 degrees, 30 to 45 minutes. Transfer chicken to cutting board; let rest 10 minutes. Carve chicken into four pieces, drizzle with remaining pepper oil and garnish with lemon wedges.

*Serve with a bold, spicy red wine, such as those coming from Portugal at the moment (watch this for ideas).
*For a quick side, place some fresh vegetables over the coal banks on each side of the grill during last 10 minutes of cooking.

*This recipe appeared in its entirety in the July/August 2003 issue of Cooks Illustrated


Photo credit: Machine is Organic on flickr

Thursday, July 2, 2009

are you eating muesli, the ultimate summer breakfast?

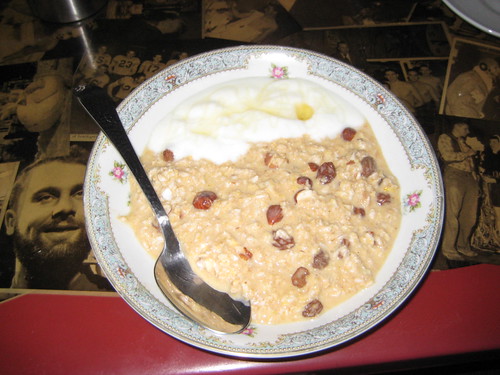
My wife found a delicious recipe for meusli, a euro-type breakfast, in a cookbook you may not know about. Feeding the Whole Family: Cooking with Whole Foods, by Cynthia Lair, is a very accessible collection of recipes emphasizing simple meals with healthful, seasonal ingredients (parents may remember Cynthia as a food writer/editor for Mothering Magazine). Don't confuse muesli with Mueslix, the dorky brand of Kellogg's cereal from the 80s. Real muesli is a simple breakfast of rolled oats (or other grains) and any combination of nuts and dried/fresh fruit. It's basically granola that hasn't been toasted. There are two styles: dry and soaked. In the dry version, muesli is eaten as is, with milk or yogurt. In the soaked version, the muesli is first allowed to sit in hot water or juice for a few hours or even overnight. Both are delicious, but we were intrigued by the soaked version as it produces a filling breakfast that can stand in for oatmeal in the summer. Despite the use of boiling water in the recipe below, the texture of soaked muesli is not the same as oatmeal. Give it a try this summer. It will keep your mornings sane and your kitchen cool.

Orange Hazelnut Muesli

Prep time: 10 minutes (excluding overnight soaking)

Ingredients

  • 2 cups rolled oats or rolled barley (or some of both)
  • 1/3 cup hazelnuts, chopped
  • 1/3 cup raisins
  • 1/2 teaspoon ground cinnamon
  • 1/2 teaspoon sea salt
  • 2 cups boiling water
  • 1 cup freshly squeezed orange juice
  • Optional toppings: sliced fruit, berries, raisins, plain yogurt w/ honey
Technique

Place oats, hazelnuts, raisins, cinnamon, and sea salt in mixing bowl. Pour boiling water over mixture and stir. Add orange juice to mixture and stir again. Cover bowl with plate or cloth and allow moisture to soften grains 6 to 8 hours or overnight. Top apple, pear, berries, and/or yogurt.

*Makes 4 servings


Thursday, June 18, 2009

the humble frittata

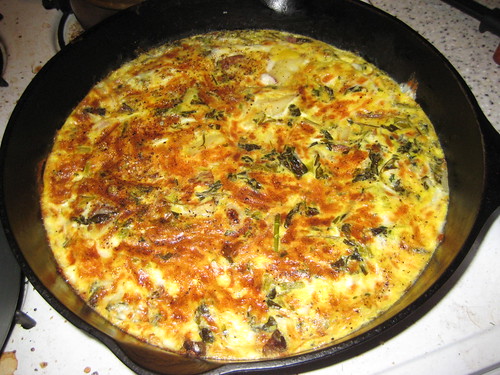
Peasant cooking at it's best, many cookbook authors and magazine writers have touted the simplicity of this Italian staple. Nearly identical to the Spanish tortilla, the frittata is the ideal vehicle to dispose of leftover vegetables and other items languishing in your fridge. It is also an ideal summer meal, as it requires just a few minutes in the broiler and tastes great the following day, even served cool or at room temperature. Many variations exist, but core elements include sauteed vegetables, cheese and/or cream, and at least six eggs. The recipe below is a hybrid of several recipes that is easy to prepare and works well for me. I've listed some suggested ingredients but this dish is so flexible that I strongly encourage using nearly any ingredient that would taste good with eggs. Bacon is quite tasty, as well as leftover roast turkey or chicken.

Ingredients

  • 6-8 eggs, depending on the size of your skillet and appetite
  • 1/2 cup milk or cream
  • 1/2 onion
  • 1/2 lb mushrooms, quartered (or other vegetables)
  • 2 tablespoons minced fresh herbs (parsley, basil, or thyme)
  • 1 cup grated cheese (parmesan, mozzarella, or chevre work well)
  • 4 tablespoons olive oil
  • kosher salt and coarsely ground pepper
Equipment
  • large, well seasoned cast iron or stainless steel skillet (you could use nonstick but I don't recommend it because of new research regarding toxins) - make sure the skillet has a metal handle, as it will go in the broiler
  • oven with a broiler
Technique
  1. Preheat your broiler. Heat two tablespoons of oil in the skillet over medium-high heat. When oil is nearly smoking, add the onions and mushrooms. Sauté them until the mushrooms have released their juices and the liquid has evaporated from the pan (10-15 minutes).
  2. In a large bowl, combine eggs, cream/milk, and herbs. Beat vigorously with a whisk or fork for several minutes (this will make the frittata fluffy).
  3. Lower the heat to low, stir in remaining olive oil, and pour the egg mixture in the skillet. Lightly stir eggs to incorporate sautéed vegetables.
  4. Once the eggs at the bottom have started to firm up, add the cheese and fold it into the egg mixture that is still liquid.
  5. Put the skillet in the broiler and cook for 3-6 minutes or until the top is lightly browned and the eggs are no longer runny (but do not overcook).
  6. Remove from broiler, sprinkle with salt and pepper, and slice into wedges.
  7. Drizzle with additional olive oil if desired.
*Serves 4 as a main event or 6 as a first course

Monday, June 15, 2009

another way to make potatoes on the grill

Fried potatoes are delicious and fast, but the thought of heating up the kitchen on a punishingly hot day makes me want to vomit, seriously. Some of you might remember that last summer I posted a recipe for roasted potatoes on the grill. While that version is delicious in its own right, the indirect grilling method requires at least 30 minutes to fully cook the potatoes. In an effort to create a more weeknight friendly version, I developed another recipe inspired by a recent Mark Bittman article about grilling over wood coals, in which he describes how one of his friends uses a cast iron griddle to sear foods over hot coals.

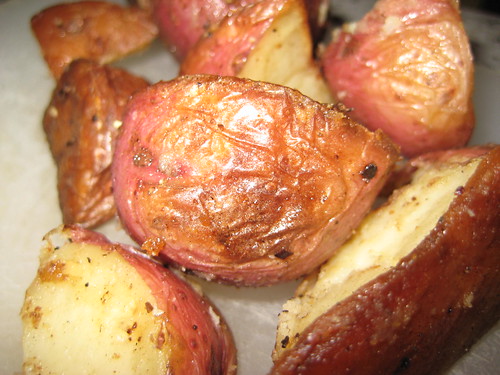
I applied this technique to quartered new potatoes, and the results exceeded my expectations. A screaming hot skillet, combined with the ambient heat from a covered grill, resulted in potatoes that were crispy on the outside, creamy within, and subtly infused with smoky goodness.

ingredients

  • 2.5 pounds small red new potatoes, quartered or cut into 1 inch pieces (I'm sure other small potatoes would work well)
  • 8 large garlic cloves
  • high quality olive oil (4 tbsp)
  • sea salt
  • black pepper
equipment
  • large cast iron skillet
  • a round metal tray, tin foil, or something that will loosely cover the skillet
  • charcoal grill
technique
  1. Ignite a full chimney of charcoal.
  2. While charcoal is heating, pour olive oil into cast iron skillet.
  3. Once coals are hot, pour them in a thick layer over 1/2 of the grill. Place the skillet on the grill grate, cover, and heat until oil is smoking.
  4. Add potatoes, loosely cover the skillet, and cover the grill.
  5. Cook for 10 minutes, then check potatoes for browning.
  6. If the bottom sides are golden brown, flip potatoes with a spatula to brown remaining sides, and add garlic cloves. Cook 10-15 minutes longer.
  7. Once potatoes are brown and crispy, remove from heat, toss w/ salt and pepper, and serve immediately.
*Serves 4 people.
*Cooking time is highly variable based on the amount of coals used, type of skillet, etc., but this is a good guide.

Monday, April 6, 2009

slow and easy food: hot-smoked pork chops

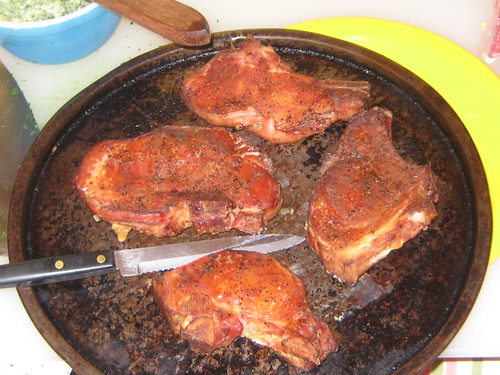
In case you don't follow my dorky tweets about food, you should, because Saturday I posted my first ever live-tweeted recipe and cooking session (see chronology and photos): smoked pork chops! These are so easy, and the flavor will detonate your taste buds. Not surprisingly, it's quite difficult to capture ingredient lists and measurements in 140 characters, so I've posted the full recipe here.

ingredients:

  • 4 thick cut, free range, well marbled pork chops from a local farm (MN-folk should try Pastures a Plenty or Prairie Pride), about 8 oz per chop
  • 1/2 gallon cold tap water
  • 3/4 cup kosher salt
  • 1/2 cup sugar
  • 4 tsp pink curing salt (to buy)
  • 2 garlic cloves, peeled and slightly smashed
  • 2 tbsp chili powder
  • 1 tbsp paprika
  • 1 tsp ground black pepper
  • wood smoking chips (apple wood, hickory, etc.), soaked in warm water
to brine chops:
  1. In a large, non-reactive bowl, place water and pork chops
  2. Run about 1-2 cups of very hot tap water into a smaller bowl
  3. Add kosher salt, sugar, curing salt, and garlic to hot water in small bowl. Stir with a fork until salt and sugar is dissolved.
  4. Pour this mixture into the large bowl and refrigerate for 4-12 hours.
  5. When ready to cook, remove chops from brine and pat dry.
to smoke chops:
  1. Mix remaining spices in a small bowl and apply to all sides of pork chops. Let chops sit on the counter for 30-60 minutes to come to room temperature.
  2. Light about 1/3 of a chimney starter loaded with charcoal briquettes (wood/lump charcoal burns too hot/fast for smoking).
  3. Bank coals on one side of your grill, put the wood chips on top (ideally in a smoker box or wrapped in a foil packet), and place a small pan on the bottom of the grill opposite the coals.
  4. Place pork chops on the grate opposite the coals. Cover and begin smoking.
  5. After about 1 hour, add 10 unlit charcoal bricks to the top of the pile. Cover and continue smoking.
  6. Chops will be ready approximately 1-2 hours later, depending on the temperature inside and outside of the grill. They should be a dark red-orange w/ and be very tender (slight charring on the edges is ok, too).
  7. Rest chops for 5 minutes before serving.
*Serves 4 people

These go really well with a strong beer, some fried or roasted potatoes, and a green salad. Sauerkraut is also an excellent choice, especially in winter.

Monday, March 23, 2009

the season's first burger: an essay

All of this blogging about other people's cheeseburgers left me feeling eager to grill some of my own. That, combined with a stretch of warm spring weather and the specific nature of my wife's pregnancy cravings, meant that the ceremonial first-burger-of-the-season would be grilled on Friday. Much to my dismay, what started as a fantasy week of balmy spring weather quickly turned cold, rainy, and straight-up medieval by Friday afternoon. I did not care. With a Summit Maibock in hand, I donned a raincoat and proceeded to load the chimney and brush the grate.

Americans love cheeseburgers. However, our sterile, Walmartian culture has completely fucked up this simple pleasure. In fact, you might say the standard American burger is FUBAR. We have ruined the hamburger patty. We have stripped the cheese of a soul. We have reduced the toppings to bland, watery, and/or chemical soaked afterthoughts. What remains is a previously sickly, previously frozen, previously in a CAFO sandwich-type-thing that is hardly fit for consumption by American pets. I mean that. I seriously mean that. And I'll stop my rant there. You read this blog because you already grind your own grass-fed beauties, right?

Time travel is possible. When you grind your own high quality, grass fed beef you will experience the delicacy enjoyed by many of our grandparents before the convenience age. When you choose to assemble a cheeseburger from the simplest, best ingredients that you can possibly find (within your local food economy), the utilitarian cheesburger is transformed into something truly sublime. Even the French have acknowledged the perfection of a grilled cheeseburger.

The only special equipment you need is a basic meat grinder - I use the Kitchen-Aid grinder attachment, but a manual countertop grinder also works well, and will earn you respect from your bad-ass grandfather.

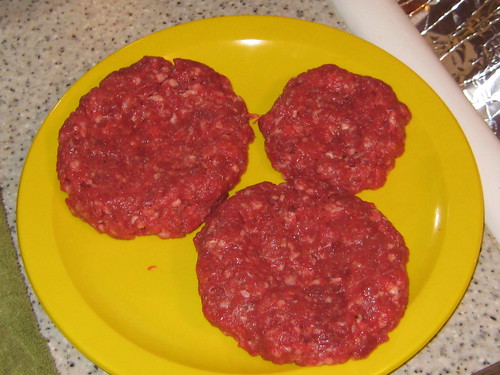
Does your gray, industrial, frozen patty look like this? I think not. So buy some respectable beef and grind your own damn burgers. It will expand your mind.

Ingredients for a burger that transcends time, space, and industrial food culture:

  • 2 lbs chuck roast, from grass fed cows raised by a small local producer (I really like Thousand Hills)
  • 1 tbsp Worcestershire sauce
  • 1 tbsp olive oil
  • freshly ground black pepper, to taste
  • kosher or sea salt, to taste
Technique:
  1. Put your grinder components and two large mixing bowls in the freezer
  2. Trim the beef to remove any tough connective tissue or large pieces of fat (but don't be too surgical or you'll risk grinding meat that's too lean - grass fed beef has very little fat to begin with)
  3. Cut trimmed beef into one inch chunks
  4. In one of the mixing bowls, combine meat with black pepper and salt
  5. Grind meat mixture through the small die into the other chilled bowl
  6. Pour Worcestshire sauce and olive oil into bowl, mix with a wooden spoon until liquids are incorporated (do not over-mix)
  7. Chill the meat in your refrigerator for 15 minutes to keep the meat cold (this is critical) - this is a good time to light the grill
  8. Using your hands, form the meat into 4 equal patties. Each should be about 1 inch think. Press your fingertips into the center of each patty to make them slightly concave (this helps them cook evenly and hold their shape)
  9. Grill over very hot coals until an instant-read thermometer registers 125 degrees (for medium rare). Too squeamish for medium rare? You're missing out. Buying good beef and grinding it yourself means you can eat a correctly grilled burger without fear.
*makes 4 celebration-sized grilled hamburger patties

P.S. Spring and Fall are fleeting portions of the grilling season because the mild outdoor temperatures permit the home chef to prepare some elements of the meal on the grill and some in the kitchen. This is especially important for homemade cheeseburgers and french fries. I do not own a deep fryer (sadly), but my wife and I have learned how to make addictive oven fries using a recipe from Cooks Illustrated. I'll feature our version of that recipe in an upcoming post.

Monday, December 29, 2008

think of kale, especially when it's -5 outside

I think about kale a lot, perhaps too much. It's an underrated vegetable for sure, and its resilience to cold and frost deserves some serious respect. I took this picture about six weeks ago in mid-November. By that time, St. Paul, MN experienced two frosts and one snow storm (when I took this picture). I harvested it the same day, to make sure we did not push our luck.

If you live in Minnesota, you know that gardens typically do not support life into November, with the exception of a few lucky pumpkins or squash. I planted this purple lacinato kale, an Italian heirloom variety, in late summer in preparation for a fall harvest, since it's always exciting to have a few things to eat after the August/September vegetable rampage. The other day it was -5 at 12:00 pm. It's amazing to think that only one month and a half has passed since eating the last gift from the garden. These thoughts keep me warm during the arctic months.

I've posted my favorite kale recipe below. Tuck it away for next season. Now, if you live in the Upper Midwest and you want to cheat, you could buy some California kale, which is in season right now, but it certainly won't be the same as brushing the snow off your own crop.

This recipe serves 4 as a side dish.

ingredients

  • 2 large bunches of kale, trimmed of tough stems
  • 1 head of garlic
  • 1 teaspoon hot red pepper flakes
  • ground black pepper
  • sea salt
  • olive oil
  • balsamic vinegar
technique
  1. heat the oven to 375 degrees
  2. wrap the garlic in foil and roast for 45 min to 1 hour - garlic should be soft and golden brown. set on the counter to cool.
  3. while garlic is roasting, bring a large pot of water to boil and add a big pinch of sea salt.
  4. put the kale in the pot and blanch for 3-4 minutes, until thickest part of leaves is tender (but not mushy!).
  5. remove kale from pot, put it in a colander, and run cold water over it until it's very cool to the touch.
  6. using a clean dish towel, squeeze all of the water out of the kale, then pull the individual leaves apart.
  7. when garlic has cooled, slice the top of the head using a sharp serrated knife and squeeze garlic into a small bowl (it should be nice and pasty at this point). add a pinch of salt and black pepper.
  8. heat two tablespoons of oil in a small skillet. when the oil is hot, add the red pepper flakes and garlic, stirring constantly for 1 minute to keep them from burning.
  9. add the kale and saute for 3-4 minutes until hot. remove from heat and stir in a splash of vinegar and another pinch of sea salt. Serve hot or luke warm.

Saturday, August 30, 2008

recipe: eggplant parmigiana on the grill

The haphazard success I achieved making roasted potatoes on the grill has inspired further experimentation with using a charcoal grill as an oven. As mentioned last time, baking/roasting food on the grill, in place of your indoor oven, keeps your house cool during the hot months. It also maximizes the amount of heat you actually use from your coals, since the most common use of charcoal is high heat, short term, flash-grilling for steaks, sausages, vegetables, etc. It's surprising how long a briquette will generate heat, so put that energy to good use by slow-cooking something before you flip the burgers.

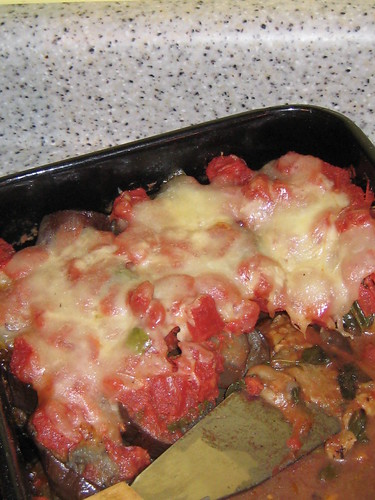
How it happened: yesterday I realized there was a bag of slender, pale-purple eggplants sitting in my fridge, just waiting for a simple summer preparation. My brain immediately leaped to a seductive recipe for eggplant parmigiana in one of my favorite Italian cookbooks, for which the ingredients and technique just begged for smoky hot coals. Moreover, it's not comfortable or convenient to set up a chaise longue in the kitchen, so do yourself a favor and bake this on the grill while soaking up some shade.

Ingredients:

  • 2 pounds eggplant (any variety), sliced into 1" disks
  • 2 15 oz cans of diced tomatoes (good ones)
  • 1 bunch basil leaves
  • 4 cloves garlic (slightly crushed)
  • .5 lbs fresh mozzarella cheese, cut into 1/2 inch cubes
  • 1/4 cup grated parmesan cheese (don't even think about the green can from Kraft. if you live in the midwest, try Sartori Parmesan from WI - it's a local alternative to the real stuff from Italy)
  • olive oil
  • salt
  • pepper
Technique:
  1. Start a full chimney-load of charcoal.
  2. While coals heat up, coat the bottom of a deep-sided baking pan (brownie pan works well) with about 2 tbsp olive oil.
  3. Layer eggplant slices in an orderly fashion across the bottom of the pan - you may need to or three layers to fit all the eggplant. Grind some pepper over the top and drizzle with some more oil. Stuff the garlic cloves randomly into the eggplant layers.
  4. When coals are hot, deposit them on one side of the grill, making a tidy-looking pile (you may need to use some tongs).
  5. Set the baking pan on the grill grate directly over the coals. Cover grill, open vents, and let it cook for about 12-15 minutes.
  6. Remove grill cover and check the color of the eggplant, it should take on a light brown color at this point (if it still looks raw you'll want to leave it on for another 5-10 minutes). You should also use a tongs to check one of the bottom slices, to make sure they're not burning.
  7. Once the eggplant has browned slightly, remove it from the grill and add another 10-15 charcoal briquettes to the existing pile (this is important, as it keeps the grill hot).
  8. Layer the basil leaves on top of the eggplant. Then pour the diced tomatoes over the basil. Then add the mozzarella and parmesan.
  9. Put the pan back on the grill, but on the cool side. Cover grill and roast for 25-30 minutes, or until cheese is melted and bubbly. Make sure you don't peek at the dish too early, because each time you lift the cover you release the heat from your grill.
  10. While patiently waiting for cheese to melt, prepare the remaining elements of your meal, which you can cook over the hot side of the grill once the eggplant is done - you should have plenty of heat left in the coals.
  11. Congratulate yourself on yet another rustic, yet elegant, grilling victory.

Sunday, August 3, 2008

recipe: roasted potatoes on the grill

In a rare moment of clairvoyance, I invented this recipe in an effort to enjoy roasted potatoes without turning on the oven. Root vegetables taste great (and are inexpensive) year around, but it can be a challenge to prepare them during the summer, as the kitchen can become a real sweat lodge. I've listed the ingredients and technique below, but you'll quickly realize that a cave person likely came to the same conclusion. This recipe begs for variation and experimentation. Go wild.

Ingredients:

  • 2.5 pounds potatoes, scrubbed and cut into 1-2 inch pieces (I used Yukon golds, but any variety should be fine)
  • 1 onion, roughly chopped
  • 4 cloves of garlic, lightly smashed
  • chopped leaves of one rosemary sprig
  • olive oil
  • black pepper
  • kosher salt
Technique:
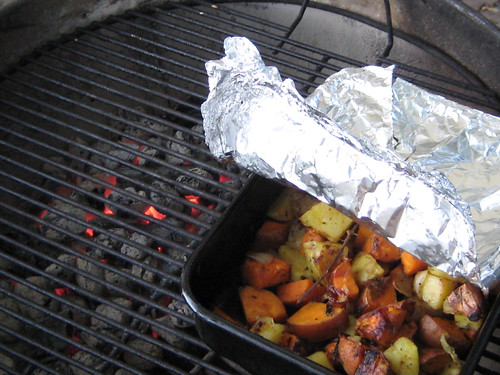
  1. Light a chimney-load of briquettes. While the coals are heating up, locate a deep, heavy roasting pan (see picture) that can handle high heat.
  2. Coat the bottom of the pan with olive oil - this will keep the potatoes from sticking
  3. Combine all of the ingredients in the pan, drizzle with more oil, and toss to evenly distribute oil, herbs, salt, and pepper. Cover it with tin foil.
  4. Once charcoal is ready, dump it onto one side of your grill - make sure it's relatively flat and not heaped in a pile.
  5. Place the pan on the grill grate directly over the coals and cover grill. Let it cook for 10-15 minutes. The goal of this step is to fry the potatoes, so you should hear a sizzling sound after a few minutes of cooking.
  6. Check the potatoes by lifting the tin foil - if the bottom layer is browning, use a spatula to toss them. Replace foil and continue frying for 5-10 more minutes.
  7. Have a drink.
  8. Once you get a nice brown color on most of the potatoes, slide the pan to the cool side of the grill - cook, covered, for at least another 10-20 minutes, or until the potatoes are fully roasted and tender.
  9. Have another drink, and enjoy your effortless grilling mastery.
There are several beautiful elements to this recipe, the main one being that you don't really have to pay close attention to it (as long as you know when they're browned and not burned). And you can leave the pan on the cool side of the grill for quite a while, which is especially helpful if you're going to use the hot coals for the rest of your meal, be it vegetables, hamburgers, sausages, etc.

Thursday, July 10, 2008

recipe: classic german bratwurst

As promised, I'm posting an abbreviated version of the brats we grilled up for my daughter's b-day. I've pulled the ingredient list and steps from the book I mentioned previously, Charcuterie: The Craft of Salting, Smoking, and Curing by Michael Ruhlmann & Brian Polcyn, which contains some additional tips and details.

Ingredients:

  • 3 pounds boneless pork shoulder butt, diced (if you're in MN, buy from Prairie Pride or Farm on Wheels from the St. Paul Farmers' Market)
  • 1 pound lean veal shoulder, diced (could also use venison or beef)
  • 1 pound pork belly or back fat, diced
  • 3 tbsp kosher salt
  • 2 teaspoons ground white pepper (or black, if you don't have white)
  • 1 1/2 teaspoons ground ginger
  • 1 1/2 teaspoons freshly grated nutmeg (very important - check out Penzey's)
  • 2 large cold eggs, lightly beaten
  • 1 cup ice-cold heavy cream
  • 10 feet hog casings, soaked in tepid water for at least 30 minutes and rinsed (I get my from Kramarzcuk's in Minneapolis).
Process:
  1. Combine all the ingredients except the eggs and cream and toss well to distribute seasonings. Chill in a bowl until ready to grind.
  2. Grind the mixture through the small die into a bowl set in ice (note: I use the Kitchen-Aid food grinder attachment, which is an excellent tool, but you could also use an old-school manual grinder).
  3. Using the paddle attachment of a standing mixer (or a strong wooden spoon if mixing by hand), mix on low speed (or stir) for 1 minute. Add the eggs and cream, start the mixer on low, and then increase the speed to medium and mix until the cream and eggs are uniformly incorporated and the sausage appears sticky, about a minute longer. Saute a small portion of the sausage and taste; adjust the seasoning if necessary. (Refrigerate the sausage mixture while you do this.)
  4. Stuff the sausage into the hog casings. Twist into 6-inch links. Refrigerate or freeze until ready to cook. (note: I use the Kitchen-Aid sausage stuffer attachment, which doesn't work very well).
  5. Gently saute, roast, or grill the sausage to an internal temperature of 150 degrees. Yes, do not overcook your sausage. You bought the best all-natural meat, correct?
Try it. You will never look at Johnsonville the same way, if you even choose to look at them.

Sunday, July 1, 2007

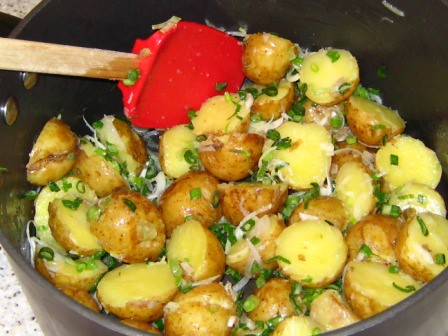
recipe: steamed potatoes with butter and green onions


This is so easy it's a joke.

Ingredients:

  • 2 pounds of baby potatoes (yukon gold or red)
  • 4 green onions (or 3 spring onions), thinly sliced
  • 4 tbsp quality butter
  • kosher salt
  • black pepper
Preparation:

1. Wash potatoes and, using a steamer insert or other contraption, steam them in a large pot for 8-10 minutes until tender (don't overcook, they should still be firm and the skins intact).

2. Drain potatoes and place in the now empty/dry pot. Slice them in half and toss with the butter to evenly coat each piece of potato. Mix in the green onions and salt/pepper. Serve hot, luke warm or room temperature.

*They reheat well, so feel free to make enough to have leftovers.

*No recipe source? Nope. This is a HOUSEKEPT original, sucka. Who cares if it only contains 3 ingredients? I don't. And you'll love us for it.

Friday, June 29, 2007

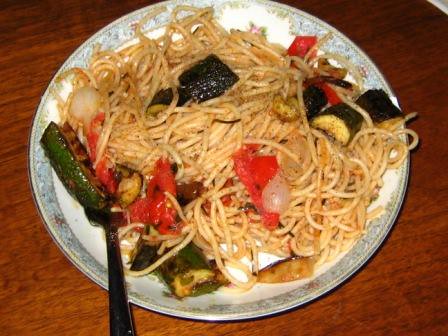
recipe: spaghetti with tomatoes, chives and basil

*Serves 4 (dinner portions) or 8 (first course portions)
*I copied this recipe from
Mario Batali's "The Babbo Cookbook."

Ingredients:

  • kosher salt
  • 1/3 cup extra-virgin olive oil
  • 8 garlic cloves, thinly sliced
  • 2 pounds small tomatoes (the best you can find in season)
  • 1 bunch chives, cut into 1-inch lengths
  • 1 bunch basil leaves, finely shredded with a knife
  • black pepper
  • kosher salt
  • 2 pounds spaghetti
  • optional: leftover zucchini or other summer vegetables
Preparation:

1. Bring 6 quarts of water to a boil and add 2 tablespoons of salt.

2. In a large saute pan, heat the olive oil over high heat until almost smoking. Lower the heat to medium-high and add the garlic cloves. Cook for 2 minutes, or until softened and slightly browned. Add the tomatoes, chives and basil and cook over high heat until the tomatoes are just beginning to burst. Season with salt and pepper.

3. Meanwhile, cook the spaghetti in the boiling water according to package directions until it is tender yet al dente. Drain the pasta and add it to the pan with the tomatoes. Toss over high heat for 1 minute, then divide evenly among four warmed pasta bowls and serve immediately.

Monday, June 25, 2007

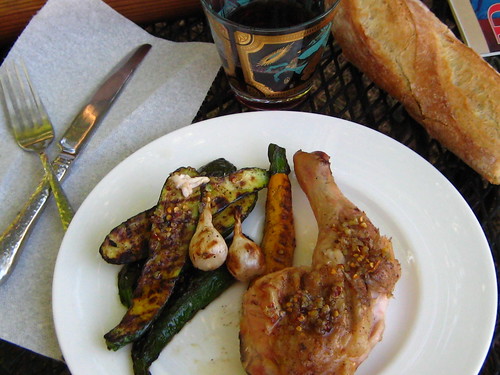
recipe: charcoal grilled chicken alla diavola

*Serves 4
*This is an easy recipe to make, but since you have to brine the chicken, I recommend making it for an early weekend dinner.

Before lighting coals, make sure that the grill is cleaned of residual ash from previous use; if left in the bottom, residual ash catches fat drippings and causes flare-ups that can singe the chicken. For this recipe, we prefer the even, slower heat generated by charcoal briquettes over faster-burning hardwood charcoal.

Chicken and Brine:

  • 2 medium garlic heads
  • 3 bay leaves, crumbled
  • 1/2 cup salt
  • 1 whole chicken (3-4 pounds), butterflied and pounded (see below)
Garlic-Pepper Oil
  • 4 medium garlic cloves, minced or pressed through a garlic press (about 4 teaspoons)
  • 2 teaspoons ground black pepper
  • 2 teaspoons red pepper flakes
  • 1/4 cup olive oil
Other
  • vegetable oil for grill grate
  • 1 lemon, cut into wedges, for garnish
1. TO BUTTERFLY CHICKEN
Use kitchen shears to cut through bones on either side of backbone, then remove and discard backbone. Flip chicken over and use heel of your hand to flatten breastbone. Cover chicken with paper towels to protect skin, then pound flat using meat pounder or rubber mallet.

*Note: This may seem tedious the first time you do it, but you'll get much quicker after making this recipe a few times.

2. TO BRINE THE CHICKEN
Combine garlic heads, bay leaves, and salt in gallon-size zipper lock bag; press out air and seal bag. Using rubber mallet or meat pounder, pound mixture until garlic cloves are crushed; transfer mixture to large container or stockpot and stir in 2 quarts cold water until salt is dissolved. Immerse chicken in brine and refrigerate until fully seasoned, about 2 hours.

3. FOR THE GARLIC-PEPPER OIL
While chicken is brining, heat garlic, black pepper, pepper flakes, and oil in small saucepan over medium heat until garlic is fragrant and sizzling and mixture registers about 200 degrees on instant-read thermometer, about 3 minutes. Remove from heat and cool to room temperature, about 40 minutes. Measure 2 tablespoons garlic-pepper oil into 2 small bowls and set aside.

4. TO FLAVOR THE CHICKEN
Remove chicken from brine and thoroughly pat dry with paper towels. Loosen the skin around the breast and thighs. Apply two tablespoons of the pepper oil underneath the loosened skin.

5. TO GRILL THE CHICKEN
Ignite about 6 quarts (1 large chimney, or about 6 pounds) charcoal briquettes and burn until covered with thin coating of light gray ash, about 20 minutes. Empty coals into grill and bank half of coals on either side of grill, leaving midsection of grill free of coals. Position grill grate over coals, cover grill, and heat grate until hot, about 5 minutes; scrape grate clean with grill brush. Lightly dip small wad paper towels in vegetable oil; holding wad with tongs, wipe grill grate. Position chicken skin-side down on grill grate over area with no coals; cover grill and fully open lid vents.

6. TO SERVE
Cook until instant-read thermometer inserted into thickest part of thigh registers 170 to 175 degrees, 30 to 45 minutes. Transfer chicken to cutting board; let rest 10 minutes. Carve chicken into four pieces, drizzle with remaining pepper oil and garnish with lemon wedges.
*For a quick side, place some fresh vegetables over the coal banks on each side of the grill during last 10 minutes of cooking.
*This recipe appeared in its entirety in the July/August 2003 issue of Cooks Illustrated