Showing posts with label dinner. Show all posts

Wednesday, April 28, 2010

recipe: now is the time to eat your lawn

Every spring, for the past several years, I've been telling myself: "Mark, eat the dandelions in your yard. They're so good for you and I bet they taste great. The co-op is selling them for $3.00 a bunch!" It's a fleeting thought that evaporates with the summer heat, when the dandelions morph from almost-pretty spring flora into desolate, dried-up, seed dispersing weeds. With a new baby and toddler in the house, my approach to lawn care has dropped to historically low levels, if it can be considered "care" at all. The upside is that my small city lot is, quite honestly, a dandelion farm. During times of famine, Italian schoolchildren were sent to the fields to gather wild greens, so why not harvest some from your (chemical free) yard?

This reality most certainly keeps my neighbors up at night, but they're missing out. In fact, they're likely chatting, nervously, about my lawn over a bag of pre-washed lettuce from sunny California. At this time of year, at least in MN, the dandelions are lush and tender, the flower heads just beginning to emerge. Dandelion greens are a great substitute for spinach or arugula, so you can prepare them as you would any other dark leafy green, such as chard, kale, collard green, etc. They even taste great in a salad with vinaigrette.

recipe: sautéed dandelion greens
In recent months I've resorted to increasingly minimalistic techniques to put fresh food on the table quickly, while keeping two little ones out of trouble. Consequently, this recipe doesn't break any new ground, but it will give you an idea of how easy it is to prepare utilitarian sautéed greens, which make an excellent first course, side dish, or leftover ingredient for other dishes like omelets and quiches. It's also an excuse to put down the laptop and weed your yard or garden.

Note: Like spinach, dandelion greens will wilt to a mere fraction of their initial volume, so you can cook a lot of them at once. Just make sure you have enough of the other ingredients to season them well.

Ingredients

  • One large bunch of trimmed, washed, and roughly chopped dandelion greens (two big fistfuls)
  • 2 cloves of garlic, thinly sliced
  • olive oil
  • balsamic vinegar
  • red pepper flakes (optional)
  • coarse salt and freshly ground pepper
Technique
  1. Heat a few tablespoons of oil in a skillet. When smoking, add the garlic and optional red pepper flakes. Cook until garlic is very fragrant (but not brown), about 30 seconds.
  2. Add the greens and stir them quickly as they wilt. Cook until greens are still bright in color, but quite tender (3-5 minutes).
  3. Add a few splashes of balsamic vinegar (to taste), season with salt and pepper, and serve immediately.
*Serves 2-4 as a side dish

Thursday, February 11, 2010

the mother of all potato recipes: tartiflette

We all know I'm a total French food dork, especially of the rustic variety. Over the years I've found that in Minnesota it's quite easy to replicate a lot of the classics with ingredients produced close to home. This is particularly true with the hearty dishes of northern/eastern France, such as Alsace-Lorraine and Savoie (as opposed to Mediterranean climes, of which MN is not).

Tartiflette, a simple, mountain-style casserole of potatoes, bacon, and cheese, hails from eastern France, mainly the Haute-Savoie. The ingredient list appears rather plain, but the results are life affirming. Dare I say gestalt?

I first ate tartiflette while living in a broom closet of an apartment in Paris. One of my neighbors, a young, wily savoyard named Sébastien, was attempting to work in Paris as a baker but he also liked to socialize. His favorite apéritif was vodka with tabasco. Our apartment building was a government subsidized community for students and young workers, and it offered very basic accommodations - most of the apartments resembled single occupant dorm rooms, with shared kitchens and bathrooms. Lucky for me, a shared kitchen meant a lot of time chatting with Sébastien about cooking, eating, and drinking while cooking, eating, and drinking. He first mentioned this dish during an animated conversation about the food of Savoie. Several days later he surprised a few friends by cooking a heroic, multi-course meal of hometown favorites, which included Chartreuse (herbaceous, jet fuel-like booze with a great story), a wild mushroom omelette, tartiflette, ham, and some sort of syrupy cake. It was an education in cold mountain culture.
I neglected to ask Sébastien to write down his recipe, but it just so happens that Anthony Bourdain has a burly, authentic rendition of tartiflette in his Les Halles cookbook. I know, I just posted a recipe based on that book, but each winter I can't keep my oven mitts off his book. It's indispensable during the dark depths of winter, when you need some epic, kill-the-pig-yourself French comfort food. In fact, his description for this recipe consists of only one sentence: "Here's more evidence that you can never have too much cheese, bacon, or starch."

Ingredients

  • 2.5 lbs potatoes, peeled
  • 2 tbsp olive oil
  • 1 medium onion, thinly sliced
  • 1/2 lb slab bacon (or strips), diced
  • 3/4 cup dry white wine (an Alsatian Riesling would work well here)
  • salt and pepper
  • 1 lb wheel of Reblochon cheese*
*Note: Savoyard hackers may infiltrate and tear down my blog after reading this note, but if you can't find Reblochon, or would prefer to buy a local cheese, you could use any soft rind, Brie-style cheese. And I know, the recipe calls for a full wheel, but cheese is the cornerstone of the dish. The other ingredients are quite inexpensive, so it's definitely worth splurging on a big nasty slab of goodness.

Technique
  1. Preheat the oven to 350 F. Place the potatoes in a large pot, cover with water, and bring to a boil. Cook for about 20 minutes, or until the potatoes are easily pierced with a paring knife. Remove from the heat, drain, and let sit until they are cool enough to handle. Dice the potatoes and set aside.
  2. In a large sauté pan, heat the oil over high heat and add the onion. Cook over high heat for about 5 minutes, until golden brown, then add the bacon and cook for another 5 minutes, stirring occasionally. Add the potatoes and wine and season with salt and pepper. Cook for 10 minutes over medium heat, stirring occasionally.
  3. Remove the mixture from heat and place in an ovenproof dish. Place the entire wheel of cheese on top and bake in the oven for 20 minutes, or until golden brown on top and bubbling. Serve hot with buckets of white wine or beer.
*Serves 4-6 as a first course or side.

Friday, January 22, 2010

recipe: winter herbless pesto

As you may have noticed, I haven't written nearly as much over the past few months, and the recipes I've published are quite spartan. This is because we had our second child, a boy, in October, and it's hard enough to cook something healthy, much less write about it. However, I am learning a lot about (and practicing) fast, wholesome, winter meals, such as the broiled eggs I wrote about earlier this month. Some people fall to convenience foods during such times, but I choose to strip down my cooking even more.

Yesterday I think I perfected what may be the perfect two-young-children-cold-winter-weeknight-that-you-could-still-serve-company meal: pasta with an herbless pesto sauce. One of the many challenges of cooking with small children is a sudden decrease in trips to the co-op. Combine that with a lack of fresh local produce, and one begins to find new romance in the pantry. After you make this one time you'll be able to make it blindfolded, without a recipe or planning.

Ingredients

  • 1 pound dried pasta (whole wheat spaghetti or penne taste great with this)
  • 1 large garlic clove
  • 1/4 lb parmesan or other hard cheese, plus more for grating
  • 1 heaping cup of walnuts, toasted
  • 1/2 cup olive oil
  • 1 tsp dried oregano
  • 1 tsp coarsely ground black pepper
  • pinch of sea salt
Techinique
  1. In the small bowl of a food processor, fitted w/ a blade attachment, combine garlic, cheese, walnuts, oregano, pepper, and salt. Pulse until the mixture resembles coarse breadcrumbs.
  2. Turn the food processor on and add olive oil until mixture resemles an oily paste (much like basil pesto).
  3. Cook pasta, drain, and toss briefly with the pesto sauce. Top individual plates with grated cheese.
*Serves 4 as a main dish or 6 as a first course.

Wednesday, November 18, 2009

woodcock: the other red meat.

Minnesota is a blessed place for a number of reasons, including an abundance of native wildfowl. Most people have heard of ruffed grouse, but what about Scolopax Minor, the noble woodcock? I recently heard a wonderful NPR interview with Clotilde Dusoulier, a young Parisian food blogger who translated Je Sais Cuisiner, an epic French cookbook, into English. I don't yet have this book but it has since risen to the top of my personal Christmas gift list. During the interview Clotilde describes how the book was intended to help a new bride cook simple, traditional French food for her new family. Among other interesting bits, she mentions that the author included recipes for some obscure dishes, some of which include wild game, because the polite cook must know what to do with a delicious wild boar or woodcock if an uncle happens to leave one at the house. You should be so lucky.

Woodcock is perhaps the most fleeting of Midwestern delicacies. Each fall, the mysterious upland birds migrate from the Northern US (mainly the Upper Midwest and New England) and Canada to the Southern states for the winter. Native Minnesota birds can be found throughout October, but large concentrations of migratory birds are only in the state for 2-3 weeks, depending on the weather, which adds to their allure as game. Their bodies are about the same size as a quail but they have a long neck, large black eyes, and a long pointed beak designed to dig in the soil for earthworms. With a taste that loosely resembles wild duck, Woodcock are truly glorious if roasted simply in a hot oven. To fully appreciate the mystique and obsession surrounding la bécasse, particularly in Europe, I recommend reading this web page. Not surprisingly, the French are the most rabid fan club, but Woodcock also are held in high esteem in the UK.

There are a few classic preparations for woodcock, most of which are mentioned in the Larousse Gastronomique. This is a variation on one of the most typical techniques.

Ingredients

  • 1 whole woodcock, plucked
  • 4 tablespoons of delicious butter, softened
  • coarse sea salt (French grey is very good for this)
  • coarsely ground black pepper
  • 1 tablespoon olive oil
  • 1/2 cup of equally scarce red wine
  • 6-8 baguette slices
Technique
  1. Preheat oven to 400 degrees. Smear the inside and outside of the bird with 2 tablespoons of the butter, making sure the breasts are well coated. Sprinkle generously with salt and pepper, again, inside and out.
  2. Heat the oil in a small heavy-bottomed sauce pot over medium heat. When it begins to smoke, add the bird and brown on all sides (about 5 minutes total).
  3. Transfer the pot to the oven and roast 10-15 minutes, or until the bird is golden brown, and the inside is hot to the touch. Important: Like duck, woodcock must be served rare or medium rare to retain its wonderful texture and flavor. The breast should be blood red when you slice it, but not cold (it's not sashimi).
  4. Put the bird on a cutting board to rest. Pour out all but one tablespoon of the fat in the pot and heat the pot over medium flame. Deglaze the pot with the wine, making sure to scrape everything tasty off the bottom. Let the wine reduce to a light, syrupy sauce. Then remove from heat, whisk in the butter, and check the seasoning.
  5. Pull the legs off of the bird and eat them while you finish the dish (with a fat glass of wine).
  6. Remove the breasts from the carcass and slice them thinly. Top the baguette slices with the sliced meat, drizzle with sauce, and sprinkle with a pinch of sea salt.
*This makes 6-8 canapés to share, or a small meal for one.

A dish this special deserves an equally special wine. The French recommend a big, bold, dry red wine. I don't argue with them. There is even a French vineyard, Domaine de la Mordorée (Chateauneuf-du-Pape), that celebrates the elusive woodcock on its bottle labels. I drank this with a woodcock I ate last year and I won't ever be the same.

Saturday, August 15, 2009

recipe: rustic tomato sauce and sausages

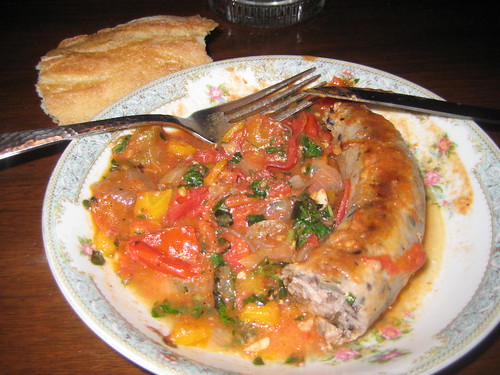
Walking through the White Bear Avenue farmer's market last Wednesday, we found a pile of roma tomatoes for just a few dollars. The heirloom slicing tomatoes in our garden are finally starting to ripen, so it seemed appropriate to use the romas for something cooked. We don't plan meals for the week as well as we should, but in the summer it's usually easy to slap something together with whatever we buy at the market. The following day I remembered reading an easy tomato sauce recipe in Mario Batali's Molto Italiano cookbook (a favorite). This, served with some wild rice pork sausages from Pastures a Plenty and a baguette, turned out to be a great weeknight dinner that also tasted great the following day.

Mario's original sauce recipe is intended for more traditional pasta applications, and calls for canned or skinned/seeded tomatoes, so I cut a few corners to make a more rustic version with chopped whole tomatoes. It's perfect for weeknights or lazy weekends.

rustic tomato sauce and sausages
*serves 4 as a main course or 6-8 as antipasto

ingredients

  • about 2 pounds fresh, locally grown (important!) tomatoes, roughly chopped - if good tomatoes are not available, a high quality canned variety will work
  • 1 onion, diced
  • 1 cup diced carrots (1-2 large, or 4-6 small carrots)
  • 4 cloves garlic, minced
  • 2 cups fresh basil leaves, chopped fine
  • 2-4 tablespoons of other fresh herbs (thyme, rosemary, oregano, parsley, etc.)
  • olive oil
  • hot red pepper flakes (optional)
  • 4 large uncooked pork sausages, dried with a towel, then dredged in flour
technique
  1. over high flame, heat about 1/4 cup of olive oil in a wide skillet until just smoking
  2. sauté onions, garlic, and carrots until soft and translucent (8-10 minutes)
  3. while vegetables are cooking, heat another skillet over high heat with 1 tbsp of olive oil and sear sausages on all sides until deep golden brown (8-10 minutes)
  4. lower heat to medium, add tomatoes and cook until tomatoes are very soft and everything resembles a very chunky sauce (probably 10-20 minutes)
  5. gently lay sausages in the sauce and simmer over low heat for another 10 minutes, until sausages are cooked
  6. after removing sausages from skillet, stir the herbs into sauce (off heat)
  7. plate the sausages, pour some sauce on the side, and drizzle with some oil
  8. serve with bread and a spicy dry red wine


Wednesday, July 22, 2009

1 chicken = 4 meals - part two

So let's say you've just finished eating a whole grilled chicken. Basking in the glow of your satiated friends, and a couple bottles of Portuguese Alentejo red, don't forget that your work with this chicken is not yet complete. Rather than throw that gnarly-looking carcass in the garbage, wrap it up and put it in the refrigerator for use in one of the following two recipes. Even though you've removed the breasts and legs, that carcass contains a lot of small, tasty morsels of chicken that work perfectly in other dishes. The wings work particularly well for this, if you didn't eat them when the chicken was grilled.

There are certainly more than two ways to incorporate leftover chicken into another meal, but these two recipes are my favorites, are very easy to make (they use kitchen staples), and really showcase the great flavor of grilled chicken.

It requires a bit of time and patience to scrape every bit of chicken from the bones, but it's well worth the effort. Using your perfectly clean hands, pull every visible piece of meat off of the carcass and wing bones. As you pick it clean, make sure you do not include any cartilage, bone fragments, or other tough bits, as they are quite offensive in the mouth. Reserve the stripped carcass and any loose bones. Meal #4 in this series is a risotto made with homemade chicken stock, so unless you're going to use them immediately, put the bones in a freezer bag and save for a rainy day.

Meal #2: Chicken Salad Sandwiches
The individual amounts of each ingredient varies widely, depending on how much chicken you have. Fortunately, it's easy to make these according to your tastes, so combine ingredients incrementally, to make sure it has the right flavors and consistency.

Ingredients

  • leftover grilled chicken, chopped into small pieces
  • high quality mayonnaise (if you don't make your own, try Mrs. Clarks, from Iowa)
  • minced onion or scallions
  • Dijon-style mustard
  • fresh herbs (basil, thyme, parsley, etc.)
  • anything else you like (walnuts, anchovies, olives, capers, cornichons, etc.)
  • salt and pepper
  • lettuce leaves
  • bread slices
Technique
Combine all ingredients in a bowl and mix lightly to combine. Be careful not to add too much mayo and mustard too soon, as it will overpower the chicken. The result should be lightly dressed, yet stick together in a spoon.


Meal #3: Green Salad with Chicken
This is a great all purpose salad recipe, that can serve as the basis for many composed dinner salads, including the reknowned salade nicoise.

Ingredients
  • leftover chicken, chopped into small pieces
  • fresh field greens or lettuces
  • parmesan shavings (use a vegetable peeler)
  • walnuts
  • olive oil
  • red wine vinegar
  • dijon mustard
  • 1 garlic clove
  • sea salt
  • pepper
Technique
  1. Make the vinegrette dressing. The exact proportion of vinegar to oil varies according to the type of vinegar used, and your own palate, but a general rule is 2 parts vinegar to 1 part oil. Smash the garlic clove with your hand or a chef's knife and place in a small cup/bowl. Add a small amount of red wine vinegar and set aside for 15-30 minutes. Then add 1 teaspoon mustard and whisk vigorously. Then slowly drizzle olive oil into vinegar (while whisking quickly) until desired consistence/taste is achieved. Set aside. (Note: you may need to increase the amounts if you're planning to server this salad to more than just a few people).
  2. Dress the salad. Tear greens into small pieces and place into a large salad bowl. Pour half of the dressing over the greens and toss with salad tongs. Taste some of salad to determine how much more dressing you'll need. An overdressed salad can be soggy and overly acidic, so it helps to add the dressing in two rounds.
  3. Pile the dressed greens on plates, and top with chicken, nuts, and parmesan shavings. Grind some pepper and sea salt over the finished salad. Serve with some big hunks of crusty bread for a filling weeknight meal or leisurely weekend lunch.
These recipes are a gateway to stress-free, simple meals that hardly require a recipe or a lot of time. Make them once and you can throw this blog post away forever (but forward it to a friend first). These meals emphasize my approach to cooking for a busy family (mine) - repurposing the leftovers from previous meals by simply adding a few quality ingredients found in most kitchens. The trick is to buy the best ingredients you can afford, as such simple meals will not hide the blandness of industrial chicken or junky vinegar.

Photo credit: protohiro on flickr


Tuesday, July 14, 2009

1 chicken = 4 meals - part one

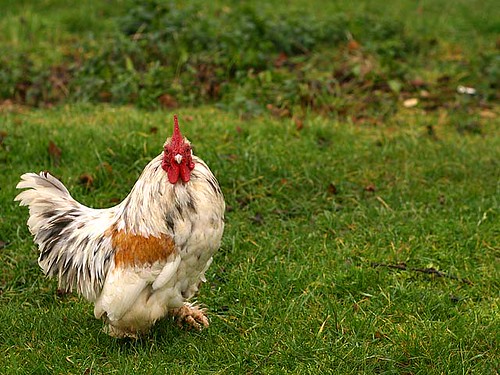
For centuries, rural cooks have recognized the utility, versatility, and caloric value of eating the whole chicken. While it may seem convenient to buy packaged chicken parts (thighs, breasts, etc.) individually, purchasing a whole chicken is far more economical, and can save you valuable time by serving as the basis for several meals. The economics are quite simple: boneless, free range chicken breasts can run $7-$8 per pound at a co-op or grocery store, but a whole chicken may cost as little as $3 per pound from the same producer, and farmers' market vendors in your area may be selling chickens for even less. If you pay $12 for a 4 pound chicken, you get breasts, legs/thighs, wings, and a carcass for making stock (for only $4 more than just buying the breasts). As an added benefit, whole chickens are "handled" less by the processor, which likely means a lower risk of contamination, and you know all of the parts are from the same healthy-looking bird.

Separating a chicken at home is quite easy, and after you do it a few times it will be second nature. Many food writers have written about how to squeeze several meals out of one chicken, but given the number of tight pocketbooks out there, it seems appropriate to provide another variation on the theme. Here we go.

Meal #1: whole grilled chicken
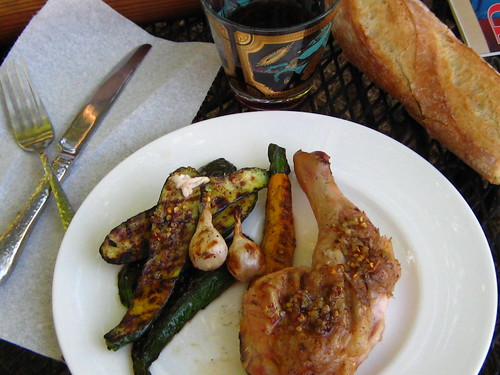
July in Minnesota is hot, so in the summer I recommend grilling your whole chicken to capitalize on warm sunshine, and keep the heat out of your kitchen. My favorite grilled chicken recipe is "alla diavola," a simple Italian version with lots of garlic and red pepper flakes. I posted this recipe back in June of 2007, but I've pasted it below because I love it that much. Make it! During cooler seasons, meal #1 could be a simple roast chicken, or even a rotisserie chicken purchased from a quality take out place. The recipe below serves 4 people, but will leave little chicken leftover for meal #2. If you have a larger grill, it is possible to prepare 2 chickens, so that is a possibility if you have company or a larger family, and still want leftovers. After eating your grilled chicken, reserve the carcass and any remaining pieces to use in meal #2, which I'll write about in the next post.

*Note: this is an easy recipe to make, but since you have to brine the chicken, I recommend making it for an early weekend dinner. You could skip the brine with good results, but the brine adds another level of juiciness that is worth the extra step.


Chicken and Brine:

  • 2 medium garlic heads
  • 3 bay leaves, crumbled
  • 1/2 cup salt
  • 1 whole chicken (3-4 pounds), butterflied and pounded (see below)
Garlic-Pepper Oil
  • 4 medium garlic cloves, minced or pressed through a garlic press (about 4 teaspoons)
  • 2 teaspoons ground black pepper
  • 2 teaspoons red pepper flakes
  • 1/4 cup olive oil
Other
  • vegetable oil for grill grate
  • 1 lemon, cut into wedges, for garnish
1. TO BUTTERFLY CHICKEN
Use kitchen shears to cut through bones on either side of backbone (see picture in this sequence), then remove and discard backbone. Flip chicken over and use heel of your hand to flatten breastbone. Cover chicken with paper towels to protect skin, then pound flat using meat pounder or rubber mallet.

*Note: This may seem tedious the first time you do it, but you'll get much quicker after making this recipe a few times.

2. TO BRINE THE CHICKEN
Combine garlic heads, bay leaves, and salt in gallon-size zipper lock bag; press out air and seal bag. Using rubber mallet or meat pounder, pound mixture until garlic cloves are crushed; transfer mixture to large container or stockpot and stir in 2 quarts cold water until salt is dissolved. Immerse chicken in brine and refrigerate until fully seasoned, about 2 hours.

3. FOR THE GARLIC-PEPPER OIL
While chicken is brining, heat garlic, black pepper, pepper flakes, and oil in small saucepan over medium heat until garlic is fragrant and sizzling and mixture registers about 200 degrees on instant-read thermometer, about 3 minutes. Remove from heat and cool to room temperature, about 40 minutes. Measure 2 tablespoons garlic-pepper oil into 2 small bowls and set aside.

4. TO FLAVOR THE CHICKEN
Remove chicken from brine and thoroughly pat dry with paper towels. Loosen the skin around the breast and thighs. Apply two tablespoons of the pepper oil underneath the loosened skin.

5. TO GRILL THE CHICKEN
Ignite about 6 quarts (1 large chimney, or about 6 pounds) charcoal briquettes and burn until covered with thin coating of light gray ash, about 20 minutes. Empty coals into grill and bank half of coals on either side of grill, leaving midsection of grill free of coals. Position grill grate over coals, cover grill, and heat grate until hot, about 5 minutes; scrape grate clean with grill brush. Lightly dip small wad paper towels in vegetable oil; holding wad with tongs, wipe grill grate. Position chicken skin-side down on grill grate over area with no coals; cover grill and fully open lid vents.

6. TO SERVE
Cook until instant-read thermometer inserted into thickest part of thigh registers 170 to 175 degrees, 30 to 45 minutes. Transfer chicken to cutting board; let rest 10 minutes. Carve chicken into four pieces, drizzle with remaining pepper oil and garnish with lemon wedges.

*Serve with a bold, spicy red wine, such as those coming from Portugal at the moment (watch this for ideas).
*For a quick side, place some fresh vegetables over the coal banks on each side of the grill during last 10 minutes of cooking.

*This recipe appeared in its entirety in the July/August 2003 issue of Cooks Illustrated


Photo credit: Machine is Organic on flickr

Thursday, June 18, 2009

the humble frittata

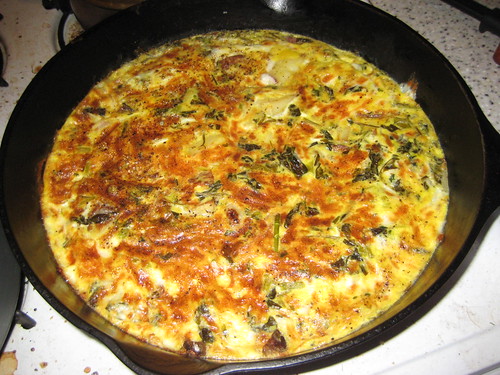
Peasant cooking at it's best, many cookbook authors and magazine writers have touted the simplicity of this Italian staple. Nearly identical to the Spanish tortilla, the frittata is the ideal vehicle to dispose of leftover vegetables and other items languishing in your fridge. It is also an ideal summer meal, as it requires just a few minutes in the broiler and tastes great the following day, even served cool or at room temperature. Many variations exist, but core elements include sauteed vegetables, cheese and/or cream, and at least six eggs. The recipe below is a hybrid of several recipes that is easy to prepare and works well for me. I've listed some suggested ingredients but this dish is so flexible that I strongly encourage using nearly any ingredient that would taste good with eggs. Bacon is quite tasty, as well as leftover roast turkey or chicken.

Ingredients

  • 6-8 eggs, depending on the size of your skillet and appetite
  • 1/2 cup milk or cream
  • 1/2 onion
  • 1/2 lb mushrooms, quartered (or other vegetables)
  • 2 tablespoons minced fresh herbs (parsley, basil, or thyme)
  • 1 cup grated cheese (parmesan, mozzarella, or chevre work well)
  • 4 tablespoons olive oil
  • kosher salt and coarsely ground pepper
Equipment
  • large, well seasoned cast iron or stainless steel skillet (you could use nonstick but I don't recommend it because of new research regarding toxins) - make sure the skillet has a metal handle, as it will go in the broiler
  • oven with a broiler
Technique
  1. Preheat your broiler. Heat two tablespoons of oil in the skillet over medium-high heat. When oil is nearly smoking, add the onions and mushrooms. Sauté them until the mushrooms have released their juices and the liquid has evaporated from the pan (10-15 minutes).
  2. In a large bowl, combine eggs, cream/milk, and herbs. Beat vigorously with a whisk or fork for several minutes (this will make the frittata fluffy).
  3. Lower the heat to low, stir in remaining olive oil, and pour the egg mixture in the skillet. Lightly stir eggs to incorporate sautéed vegetables.
  4. Once the eggs at the bottom have started to firm up, add the cheese and fold it into the egg mixture that is still liquid.
  5. Put the skillet in the broiler and cook for 3-6 minutes or until the top is lightly browned and the eggs are no longer runny (but do not overcook).
  6. Remove from broiler, sprinkle with salt and pepper, and slice into wedges.
  7. Drizzle with additional olive oil if desired.
*Serves 4 as a main event or 6 as a first course

Monday, April 6, 2009

slow and easy food: hot-smoked pork chops

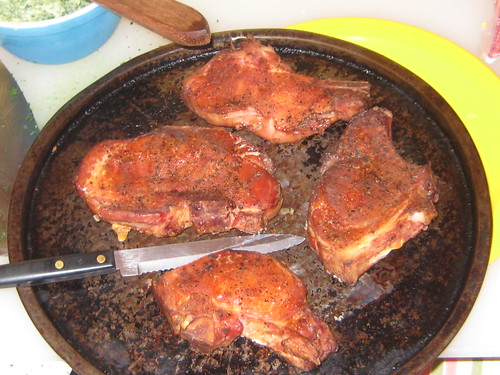
In case you don't follow my dorky tweets about food, you should, because Saturday I posted my first ever live-tweeted recipe and cooking session (see chronology and photos): smoked pork chops! These are so easy, and the flavor will detonate your taste buds. Not surprisingly, it's quite difficult to capture ingredient lists and measurements in 140 characters, so I've posted the full recipe here.

ingredients:

  • 4 thick cut, free range, well marbled pork chops from a local farm (MN-folk should try Pastures a Plenty or Prairie Pride), about 8 oz per chop
  • 1/2 gallon cold tap water
  • 3/4 cup kosher salt
  • 1/2 cup sugar
  • 4 tsp pink curing salt (to buy)
  • 2 garlic cloves, peeled and slightly smashed
  • 2 tbsp chili powder
  • 1 tbsp paprika
  • 1 tsp ground black pepper
  • wood smoking chips (apple wood, hickory, etc.), soaked in warm water
to brine chops:
  1. In a large, non-reactive bowl, place water and pork chops
  2. Run about 1-2 cups of very hot tap water into a smaller bowl
  3. Add kosher salt, sugar, curing salt, and garlic to hot water in small bowl. Stir with a fork until salt and sugar is dissolved.
  4. Pour this mixture into the large bowl and refrigerate for 4-12 hours.
  5. When ready to cook, remove chops from brine and pat dry.
to smoke chops:
  1. Mix remaining spices in a small bowl and apply to all sides of pork chops. Let chops sit on the counter for 30-60 minutes to come to room temperature.
  2. Light about 1/3 of a chimney starter loaded with charcoal briquettes (wood/lump charcoal burns too hot/fast for smoking).
  3. Bank coals on one side of your grill, put the wood chips on top (ideally in a smoker box or wrapped in a foil packet), and place a small pan on the bottom of the grill opposite the coals.
  4. Place pork chops on the grate opposite the coals. Cover and begin smoking.
  5. After about 1 hour, add 10 unlit charcoal bricks to the top of the pile. Cover and continue smoking.
  6. Chops will be ready approximately 1-2 hours later, depending on the temperature inside and outside of the grill. They should be a dark red-orange w/ and be very tender (slight charring on the edges is ok, too).
  7. Rest chops for 5 minutes before serving.
*Serves 4 people

These go really well with a strong beer, some fried or roasted potatoes, and a green salad. Sauerkraut is also an excellent choice, especially in winter.

Monday, March 23, 2009

the season's first burger: an essay

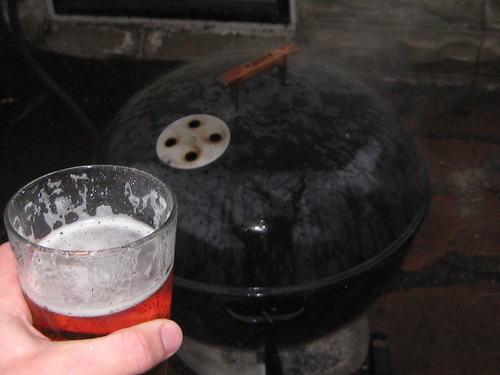
All of this blogging about other people's cheeseburgers left me feeling eager to grill some of my own. That, combined with a stretch of warm spring weather and the specific nature of my wife's pregnancy cravings, meant that the ceremonial first-burger-of-the-season would be grilled on Friday. Much to my dismay, what started as a fantasy week of balmy spring weather quickly turned cold, rainy, and straight-up medieval by Friday afternoon. I did not care. With a Summit Maibock in hand, I donned a raincoat and proceeded to load the chimney and brush the grate.

Americans love cheeseburgers. However, our sterile, Walmartian culture has completely fucked up this simple pleasure. In fact, you might say the standard American burger is FUBAR. We have ruined the hamburger patty. We have stripped the cheese of a soul. We have reduced the toppings to bland, watery, and/or chemical soaked afterthoughts. What remains is a previously sickly, previously frozen, previously in a CAFO sandwich-type-thing that is hardly fit for consumption by American pets. I mean that. I seriously mean that. And I'll stop my rant there. You read this blog because you already grind your own grass-fed beauties, right?

Time travel is possible. When you grind your own high quality, grass fed beef you will experience the delicacy enjoyed by many of our grandparents before the convenience age. When you choose to assemble a cheeseburger from the simplest, best ingredients that you can possibly find (within your local food economy), the utilitarian cheesburger is transformed into something truly sublime. Even the French have acknowledged the perfection of a grilled cheeseburger.

The only special equipment you need is a basic meat grinder - I use the Kitchen-Aid grinder attachment, but a manual countertop grinder also works well, and will earn you respect from your bad-ass grandfather.

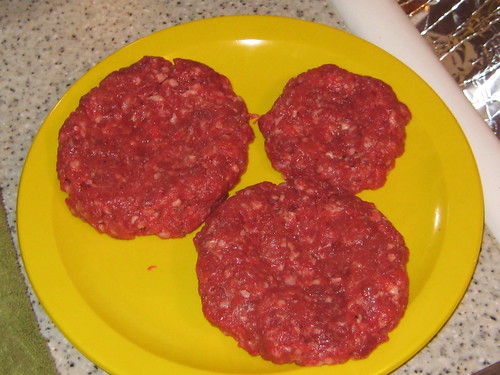
Does your gray, industrial, frozen patty look like this? I think not. So buy some respectable beef and grind your own damn burgers. It will expand your mind.

Ingredients for a burger that transcends time, space, and industrial food culture:

  • 2 lbs chuck roast, from grass fed cows raised by a small local producer (I really like Thousand Hills)
  • 1 tbsp Worcestershire sauce
  • 1 tbsp olive oil
  • freshly ground black pepper, to taste
  • kosher or sea salt, to taste
Technique:
  1. Put your grinder components and two large mixing bowls in the freezer
  2. Trim the beef to remove any tough connective tissue or large pieces of fat (but don't be too surgical or you'll risk grinding meat that's too lean - grass fed beef has very little fat to begin with)
  3. Cut trimmed beef into one inch chunks
  4. In one of the mixing bowls, combine meat with black pepper and salt
  5. Grind meat mixture through the small die into the other chilled bowl
  6. Pour Worcestshire sauce and olive oil into bowl, mix with a wooden spoon until liquids are incorporated (do not over-mix)
  7. Chill the meat in your refrigerator for 15 minutes to keep the meat cold (this is critical) - this is a good time to light the grill
  8. Using your hands, form the meat into 4 equal patties. Each should be about 1 inch think. Press your fingertips into the center of each patty to make them slightly concave (this helps them cook evenly and hold their shape)
  9. Grill over very hot coals until an instant-read thermometer registers 125 degrees (for medium rare). Too squeamish for medium rare? You're missing out. Buying good beef and grinding it yourself means you can eat a correctly grilled burger without fear.
*makes 4 celebration-sized grilled hamburger patties

P.S. Spring and Fall are fleeting portions of the grilling season because the mild outdoor temperatures permit the home chef to prepare some elements of the meal on the grill and some in the kitchen. This is especially important for homemade cheeseburgers and french fries. I do not own a deep fryer (sadly), but my wife and I have learned how to make addictive oven fries using a recipe from Cooks Illustrated. I'll feature our version of that recipe in an upcoming post.

Wednesday, January 28, 2009

cabbage soup deserves more respect

When was the last time you ate a bowl of cabbage soup that wasn't borscht? Let's face it: green cabbage isn't sexy. Radicchio is cool because it's small and pretty, and you don't have to say the word cabbage when discussing it. Napa cabbage is a touch more sophisticated because it reminds one of verdant green valleys of vineyards. But ubiquitous green cabbage, my friends, often evokes images of damp medieval huts and grubby serfs, or the funky humid smell that often accompanies over-cooked, mushy renditions of cabbage that misrepresent the beauty and utility of this particular vegetable.

Cabbage soup, in particular, can be extra stinky, so it is often avoided to prevent its unique odors from permeating your house, children, and belongings.

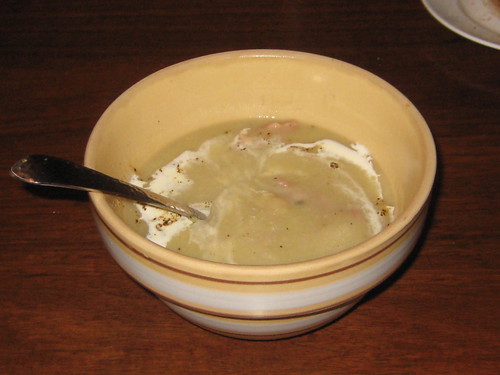
Forget what you just read and try the soup recipe below. It smells great and demonstrates the many reasons one should respect and cherish the simplicity of green/white cabbage, such as:

  1. It tastes great when prepared properly, whether cooked as soup, braised as a side dish, shredded for a salad (think coleslaw), or cured as sauerkraut;
  2. Cabbage is perhaps one of the cheapest vegetables available (often selling for 99 cents per pound or less!);
  3. It stores very well in the refrigerator - I harvested the cabbage for the soup in the picture from my garden in early November and didn't eat them until January - they were simply wrapped in plastic in my crisper);
  4. Cabbage is one of the few local vegetables that is available midwinter in Minnesota and other northern states.
This recipe serves 6 as first course or 4 as a main dish.

ingredients

  • 1/2 cup olive oil
  • 1 large green or white cabbage, cored and sliced very thin
  • 3/4 cup white wine
  • 3 large potatoes, coarsely chopped
  • 2 onions, coarsely chopped
  • a pinch of freshly grated nutmeg
  • 6 thick slices of fresh pork belly (or 1 cup cubed bacon or ham)
  • 3 garlic cloves, thinly sliced
  • 1 cup heavy cream
  • salt and pepper
technique
  1. Heat 5 tablespoons of the oil in a heavy dutch oven or soup pot. Add the cabbage and cook, stirring occasionally, for a few minutes, until softened but not colored. Add the white wine, potatoes, onions, and nutmeg and pour in enough water to cover. Add the pork and bring to a boil, then lower the heat, and simmer gently for about 1 hour, until the meat is tender.
  2. Remove the meat with a slotted spoon. Transfer the soup to a blender or food processor and process until smooth. Season to taste with salt and pepper.
  3. Heat the remaining oil in a small skillet. Add the garlic and cook over low heat, stirring frequently, unti it is just beginning to color. If necessary, reheat the soup over low heat to keep hot.
  4. Serve hot in bowls with a swirl of cream and the garlic chips. If using pork belly, place one piece in each bowl or upon a piece of toasted bread. If using ham or bacon, divide evenly among each bowl.
This is a very hearty soup that easily works as dinner with some good bread and a big beer or glass of dry white wine.

Note: I adapted this recipe from Pork & Sons, which I wrote about earlier this week.

Sunday, December 21, 2008

depression = polenta and fried eggs


If my last recipe wasn't thrifty enough for you, then hold on, because this is about as cheap as one can possibly eat. Everyone is saying that the economy will only get worse, so enjoy potato leek soup while you can - it may soon be a luxury.

Every so often, our family faces an empty refrigerator, and just when we're about to order pizza or consider going out, we go back to this recipe as an extremely simple, delicious meal from pantry staples. Polenta, or grits if you live below the Mason-Dixon, are a true blessing to the weeknight chef. Otherwise known as coarsely ground cornmeal, polenta is available at any grocery store, and many co-ops offer it in their bulk sections. It keeps in your pantry indefinitely, so it's an item every home chef should have on hand. Also, if you live in the Midwest, polenta is often ground from local corn - a good way to continue eating locally during the cold winter months.

Aside from olive oil and parmesan cheese, the only other ingredients you'll need are eggs. At around $3.00 per dozen, organic eggs are perhaps the cheapest source of animal protein available to the frugal locavore. You could save money buying conventional, manufactured eggs, but once you learn about the conditions in which those birds live, you'll be happy to shell out an extra dollar for some ethical, quality product. Besides, if you eat eggs as a way to cut down on the amount of meat you buy, spending a little extra should not be a big deal.

I saw this specific recipe in the NYT's Dining section, which is an excellent source for simple meal ideas (especially the Mark Bittman articles). Serve it with a salad or some sauteed greens for a complete, balanced meal.

This recipe serves 4 people.

Ingredients:

  • 4 1/2 cups low-sodium broth or water
  • 1 1/2 cups polenta (not quick-cooking), coarse corn meal or corn grits
  • 3/4 teaspoon salt
  • 2 to 4 tablespoons butter
  • 1/4 teaspoon freshly ground black pepper, more to taste
  • 1 1-ounce chunk or 1/4 cup grated Parmesan cheese
  • 2 tablespoons olive oil
  • 8 large eggs
  • Coarse sea salt for garnish.
Technique:
  1. In a large pot, bring broth or water to a simmer. Stir in the polenta and salt. Simmer, stirring frequently, until thickened to taste, 10 to 20 minutes. Stir in butter and pepper; cover pot to keep warm.
  2. Using a vegetable peeler, slice cheese into slivers, or grate it on largest holes of a box grater.
  3. In a large skillet, heat 1 tablespoon olive oil until very hot. Fry 4 eggs until edges are crispy and yolks still runny. Repeat with remaining oil and eggs.
  4. Pile polenta into 4 bowls and top with cheese and then fried eggs. Garnish with sea salt and more pepper and serve.

Tuesday, October 7, 2008

harvest your own free range, organic, heirloom chickens

As a stomach driven individual, one of the more fulfilling ways to eat is to participate in each step of the process: harvest, preparation, and cooking. Gardeners know this. Mushroom foragers know this. And yes, hunters know this. I'm saddened by the tension that often exists between people who selectively harvest wild raspberries, and the people who selectively harvest the birds that eat those berries. Hunting is one of my passions, as it's an excellent way to spend time with friends/family, get some exercise, and possibly procure some delicious table fare.

In my home state, Minnesota, we have a plentiful (yet shrinking) amount of wild, open space that supports a massive amount of edible plants and animals. For those of you not familiar with the ruffed grouse, it's basically a wild chicken that lives in new growth forests in the northern United States and Canada. Like other chicken-type birds, ruffed grouse obtain most of their food by searching the forest floor for berries, nuts, tree buds, clover, and other tasty bits. Because they spend the majority of their day on the ground (rather than in the air), their meat and flavor resembles that of a free range, domesticated chicken - white and juicy.

For a long time, Europeans and Americans have understood and respected the utilization of wild food sources, but as lifestyles continue to shift away from local food sources, the perceived importance of ethical, sustainable, hunting practices is waning. This is not to say we should all build our own sod huts and eat only what we kill; rather, it's a matter of revisiting concepts like hunting as part of a broader, sustainable eating culture and philosophy.

To further pique your interest, here's a recipe for the next grouse you procure (either through the sights of your 20 gauge, or the freezer of a friend).

ingredients:

  • one whole grouse (plucked*, with feet and head removed)
  • 2 tbsp high quality butter (softened)
  • 1 tbsp olive oil
  • coarse salt
  • freshly ground black pepper
  • 1 bottle of bold, mildly expensive red wine (how many grouse do you shoot?)
  • one small shallot, minced
A note about plucking wild game: Many people think it's a huge hassle to pluck their game birds, so they skin them. Don't follow their advice - when you remove the skin prior to cooking, you remove the fat (the flavor!) and expose the normally juicy meat to intense heat. Plucking is easy work if you plan ahead. Once the bird is shot, field dress it normally, and find a cool, dark, sheltered location, such as a root cellar, basement, garage, shed, or old refrigerator. Using a piece of string, hang the bird by its feet and let age for 24-36 hours. The secret is simple: soon after the bird is shot, it cools and rigor mortis stiffens the birds muscles, including those that hold the feathers in. By aging the bird, the muscles loosen again, and they can be pulled out with ease. Don't whine. Just trust me.

technique:
  1. preheat your oven to 400 degrees
  2. wash and dry the bird and make sure you've removed any remaining shot (tweezers work well)
  3. smear one tablespoon of the butter all over the bird (inside and out); repeat with the salt and pepper
  4. find a small, heavy bottomed, ovenproof sauce pan or skillet that will hold the bird(s), heat it over medium/high flame, and add the olive oil
  5. once the oil is hot, sear the bird on all sides using a tongs - should be golden brown when you're done (4-6 minutes)
  6. put the pan in the oven and roast for 15-30 minutes (until internal temparature reaches 150 degrees - this is wild game, not some sickly factory bird, so don't worry)
  7. once the bird is ready, put it on a small serving plate and loosely cover with foil
  8. put the pan back on the stove and toss in the minced shallot, saute over low heat for 1 minute (don't burn the f'in shallots!)
  9. add 1/4 cup of the red wine and reduce until the remaining liquid has thickened and resembles a light syrup.
  10. off heat, stir in the remaining tablespoon of butter. then carve the bird and drizzle with the sauce.
  11. pour and drink the remaining wine with elegant-yet-woodsy confidence.
*serves 1 tired, accomplished hunter, or two normal people (as a first course)

Thursday, July 10, 2008

recipe: classic german bratwurst

As promised, I'm posting an abbreviated version of the brats we grilled up for my daughter's b-day. I've pulled the ingredient list and steps from the book I mentioned previously, Charcuterie: The Craft of Salting, Smoking, and Curing by Michael Ruhlmann & Brian Polcyn, which contains some additional tips and details.

Ingredients:

  • 3 pounds boneless pork shoulder butt, diced (if you're in MN, buy from Prairie Pride or Farm on Wheels from the St. Paul Farmers' Market)
  • 1 pound lean veal shoulder, diced (could also use venison or beef)
  • 1 pound pork belly or back fat, diced
  • 3 tbsp kosher salt
  • 2 teaspoons ground white pepper (or black, if you don't have white)
  • 1 1/2 teaspoons ground ginger
  • 1 1/2 teaspoons freshly grated nutmeg (very important - check out Penzey's)
  • 2 large cold eggs, lightly beaten
  • 1 cup ice-cold heavy cream
  • 10 feet hog casings, soaked in tepid water for at least 30 minutes and rinsed (I get my from Kramarzcuk's in Minneapolis).
Process:
  1. Combine all the ingredients except the eggs and cream and toss well to distribute seasonings. Chill in a bowl until ready to grind.
  2. Grind the mixture through the small die into a bowl set in ice (note: I use the Kitchen-Aid food grinder attachment, which is an excellent tool, but you could also use an old-school manual grinder).
  3. Using the paddle attachment of a standing mixer (or a strong wooden spoon if mixing by hand), mix on low speed (or stir) for 1 minute. Add the eggs and cream, start the mixer on low, and then increase the speed to medium and mix until the cream and eggs are uniformly incorporated and the sausage appears sticky, about a minute longer. Saute a small portion of the sausage and taste; adjust the seasoning if necessary. (Refrigerate the sausage mixture while you do this.)
  4. Stuff the sausage into the hog casings. Twist into 6-inch links. Refrigerate or freeze until ready to cook. (note: I use the Kitchen-Aid sausage stuffer attachment, which doesn't work very well).
  5. Gently saute, roast, or grill the sausage to an internal temperature of 150 degrees. Yes, do not overcook your sausage. You bought the best all-natural meat, correct?
Try it. You will never look at Johnsonville the same way, if you even choose to look at them.

Friday, June 29, 2007

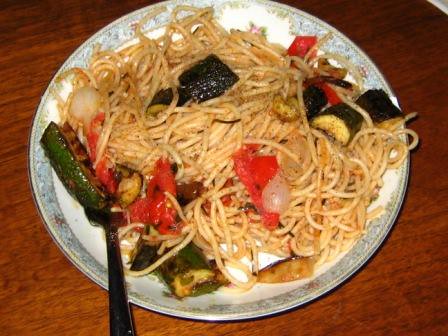
recipe: spaghetti with tomatoes, chives and basil

*Serves 4 (dinner portions) or 8 (first course portions)
*I copied this recipe from
Mario Batali's "The Babbo Cookbook."

Ingredients:

  • kosher salt
  • 1/3 cup extra-virgin olive oil
  • 8 garlic cloves, thinly sliced
  • 2 pounds small tomatoes (the best you can find in season)
  • 1 bunch chives, cut into 1-inch lengths
  • 1 bunch basil leaves, finely shredded with a knife
  • black pepper
  • kosher salt
  • 2 pounds spaghetti
  • optional: leftover zucchini or other summer vegetables
Preparation:

1. Bring 6 quarts of water to a boil and add 2 tablespoons of salt.

2. In a large saute pan, heat the olive oil over high heat until almost smoking. Lower the heat to medium-high and add the garlic cloves. Cook for 2 minutes, or until softened and slightly browned. Add the tomatoes, chives and basil and cook over high heat until the tomatoes are just beginning to burst. Season with salt and pepper.

3. Meanwhile, cook the spaghetti in the boiling water according to package directions until it is tender yet al dente. Drain the pasta and add it to the pan with the tomatoes. Toss over high heat for 1 minute, then divide evenly among four warmed pasta bowls and serve immediately.

Monday, June 25, 2007

recipe: charcoal grilled chicken alla diavola

*Serves 4
*This is an easy recipe to make, but since you have to brine the chicken, I recommend making it for an early weekend dinner.

Before lighting coals, make sure that the grill is cleaned of residual ash from previous use; if left in the bottom, residual ash catches fat drippings and causes flare-ups that can singe the chicken. For this recipe, we prefer the even, slower heat generated by charcoal briquettes over faster-burning hardwood charcoal.

Chicken and Brine:

  • 2 medium garlic heads
  • 3 bay leaves, crumbled
  • 1/2 cup salt
  • 1 whole chicken (3-4 pounds), butterflied and pounded (see below)
Garlic-Pepper Oil
  • 4 medium garlic cloves, minced or pressed through a garlic press (about 4 teaspoons)
  • 2 teaspoons ground black pepper
  • 2 teaspoons red pepper flakes
  • 1/4 cup olive oil
Other
  • vegetable oil for grill grate
  • 1 lemon, cut into wedges, for garnish
1. TO BUTTERFLY CHICKEN
Use kitchen shears to cut through bones on either side of backbone, then remove and discard backbone. Flip chicken over and use heel of your hand to flatten breastbone. Cover chicken with paper towels to protect skin, then pound flat using meat pounder or rubber mallet.

*Note: This may seem tedious the first time you do it, but you'll get much quicker after making this recipe a few times.

2. TO BRINE THE CHICKEN
Combine garlic heads, bay leaves, and salt in gallon-size zipper lock bag; press out air and seal bag. Using rubber mallet or meat pounder, pound mixture until garlic cloves are crushed; transfer mixture to large container or stockpot and stir in 2 quarts cold water until salt is dissolved. Immerse chicken in brine and refrigerate until fully seasoned, about 2 hours.

3. FOR THE GARLIC-PEPPER OIL
While chicken is brining, heat garlic, black pepper, pepper flakes, and oil in small saucepan over medium heat until garlic is fragrant and sizzling and mixture registers about 200 degrees on instant-read thermometer, about 3 minutes. Remove from heat and cool to room temperature, about 40 minutes. Measure 2 tablespoons garlic-pepper oil into 2 small bowls and set aside.

4. TO FLAVOR THE CHICKEN
Remove chicken from brine and thoroughly pat dry with paper towels. Loosen the skin around the breast and thighs. Apply two tablespoons of the pepper oil underneath the loosened skin.

5. TO GRILL THE CHICKEN
Ignite about 6 quarts (1 large chimney, or about 6 pounds) charcoal briquettes and burn until covered with thin coating of light gray ash, about 20 minutes. Empty coals into grill and bank half of coals on either side of grill, leaving midsection of grill free of coals. Position grill grate over coals, cover grill, and heat grate until hot, about 5 minutes; scrape grate clean with grill brush. Lightly dip small wad paper towels in vegetable oil; holding wad with tongs, wipe grill grate. Position chicken skin-side down on grill grate over area with no coals; cover grill and fully open lid vents.

6. TO SERVE
Cook until instant-read thermometer inserted into thickest part of thigh registers 170 to 175 degrees, 30 to 45 minutes. Transfer chicken to cutting board; let rest 10 minutes. Carve chicken into four pieces, drizzle with remaining pepper oil and garnish with lemon wedges.
*For a quick side, place some fresh vegetables over the coal banks on each side of the grill during last 10 minutes of cooking.
*This recipe appeared in its entirety in the July/August 2003 issue of Cooks Illustrated

Sunday, June 24, 2007

recipe: green salad with egg and bacon

We were starving upon returning home from the market, so I made one of my favorite salads with some the the items we purchased. Eating a "main course" salad is an excellent way to eat healthy and save money, and this one makes a great weekend lunch or a light dinner.

Ingredients:

  • 2 eggs
  • 4 strips of bacon (or 4-6 oz slab bacon)
  • lettuce
  • parmesan cheese (or any other firm white cheese)
  • olive oil
  • red wine vinegar
  • dijon mustard
  • 1 garlic clove
  • coarse salt (kosher or sea)
  • pepper

Directions:
Wash, trim and tear the lettuce into small pieces. Dice the bacon into small pieces and fry in a small nonstick frying pan until crisp - place bacon in a small bowl and wipe out pan.

While bacon is cooking, make the dressing:
Smash the garlic clove with your hand or a chef's knife and place in a small cup/bowl. Add one ounce of red wine vinegar and set aside for 15-30 minutes. Then add 1 teaspoon mustard and whisk vigorously. Then slowly drizzle olive oil into vinegar (while whisking quickly) until desired consistence/taste is achieved. Set aside.

Fry the eggs:
Add 1 tablespoon olive oil to the pan and heat until shimmering. Crack both eggs into the pan and fry until the whites are cooked, but the yolks are still runny. Remove pan from heat.

Assemble the salad:

Divide the greens evenly between two dinner plates. Drizzle some dressing on each salad and use two forks to toss (important). Top each plate with bacon pieces and one egg. Crack pepper and sprinkle salt over each salad. Using a vegetable peeler, shave a little bit of cheese over each plate. Eat.

*Makes 2 servings
*Serve with a glass of red wine and bread for a complete meal.


Wednesday, June 20, 2007

recipe: corn chowder


Ingredients:

  • 6 tablespoons unsalted butter
  • 4 garlic cloves, minced6 shallots (or 1 small onion), chopped
  • 1 fresh jalapeno pepper, roasted (over a stove flame), peeled, seeded and minced
  • 2 cups chicken stock (if not homemade, use Swanson organic)
  • 6 cups corn kernels (frozen or fresh)
  • pinch of salt
  • 2 cups cream
  • chopped cilantro (for garnish)
  • sour cream (for garnish)
Directions:
Melt the butter in a large saucepan and saute the garlic and shallots until tender. Stir in the jalapeno pepper and cook a minute longer.

Add the stock and corn to the saucepan and bring to a boil. Reduce the heat and simmer for 5 minutes.

Using a potato masher, mash the soup to soften and break up the corn mixture. Season with salt and add the cream. Reheat thoroughly but do not allow the soup to come to a boil. Serve hot topped with cilantro and a dollop of sour cream.

*makes 4 dinner servings
*for a complete meal, serve with good bread and a simple green salad vinagrette

Source:
Martha Stewart Living Cookbook